Plein Air Setups pt. 2- My Current Setup

This is my current setup. The last post I did on this was from May of 2014. It's still a useful resource for the cheapest, most straightforward setup. The whole thing cost about 50-75$ to make. It goes into a lot of detail about how I made it, and is probably worth reading over for those who are considering making their own. However, I've been using a new tripod, shelf, palette, and backpack for two years now, so it seems like its time to update my blog with more current information.
Getting the tripod and tripod mount to work is not, in my opinion, particularly difficult. Same goes for the backing for your paper. I'll go over these two elements first. I think a lot of people could easily make these. The shelf, however, is more complex. There's no two ways about it. The measurements are more important, and there's more pieces to put together.
If that's so, why build it when I could buy it? The simplest reason is ergonomics. I had issues painting "over" my shelf. I had to lean in farther than I wanted. Additionally, if I worked on half sheets, the backing would stick out too far and make it hard to see all of my palette down below. I was having to sort of reach under my painting to get to my water and paints. I wanted a setup that shifted my body to the left, and allowed more room on the right for mixing. I wanted more lateral shelf space, so I could have both a water bowl that was clean and a water bowl that was dirty. You can't yet buy a shelf that can do all that.
Altering My Setup to Create Better Ergonomics-
Now that we're done with that preamble, what's the big difference between my current setup and what I used 2 years ago? On a basic mechanical level, not much- all the parts fit together the same. What's changed is the location of all the parts. I'll show you with some pics eventually, but I did 3 basic things-
1) I moved the velcro under my backing to the right 3", so it would shift my board to the left
2) I moved the connection point where my tripod mount attaches to the tripod quick-release to the right 3" too (so that it's now off-center)
3) I made my shelf wider and shifted it 3" to the right. More on that below as well.
In total, I gained 9" of more space to the right, which allows me to see my palette much better while mixing and painting. What's that look like from the front?
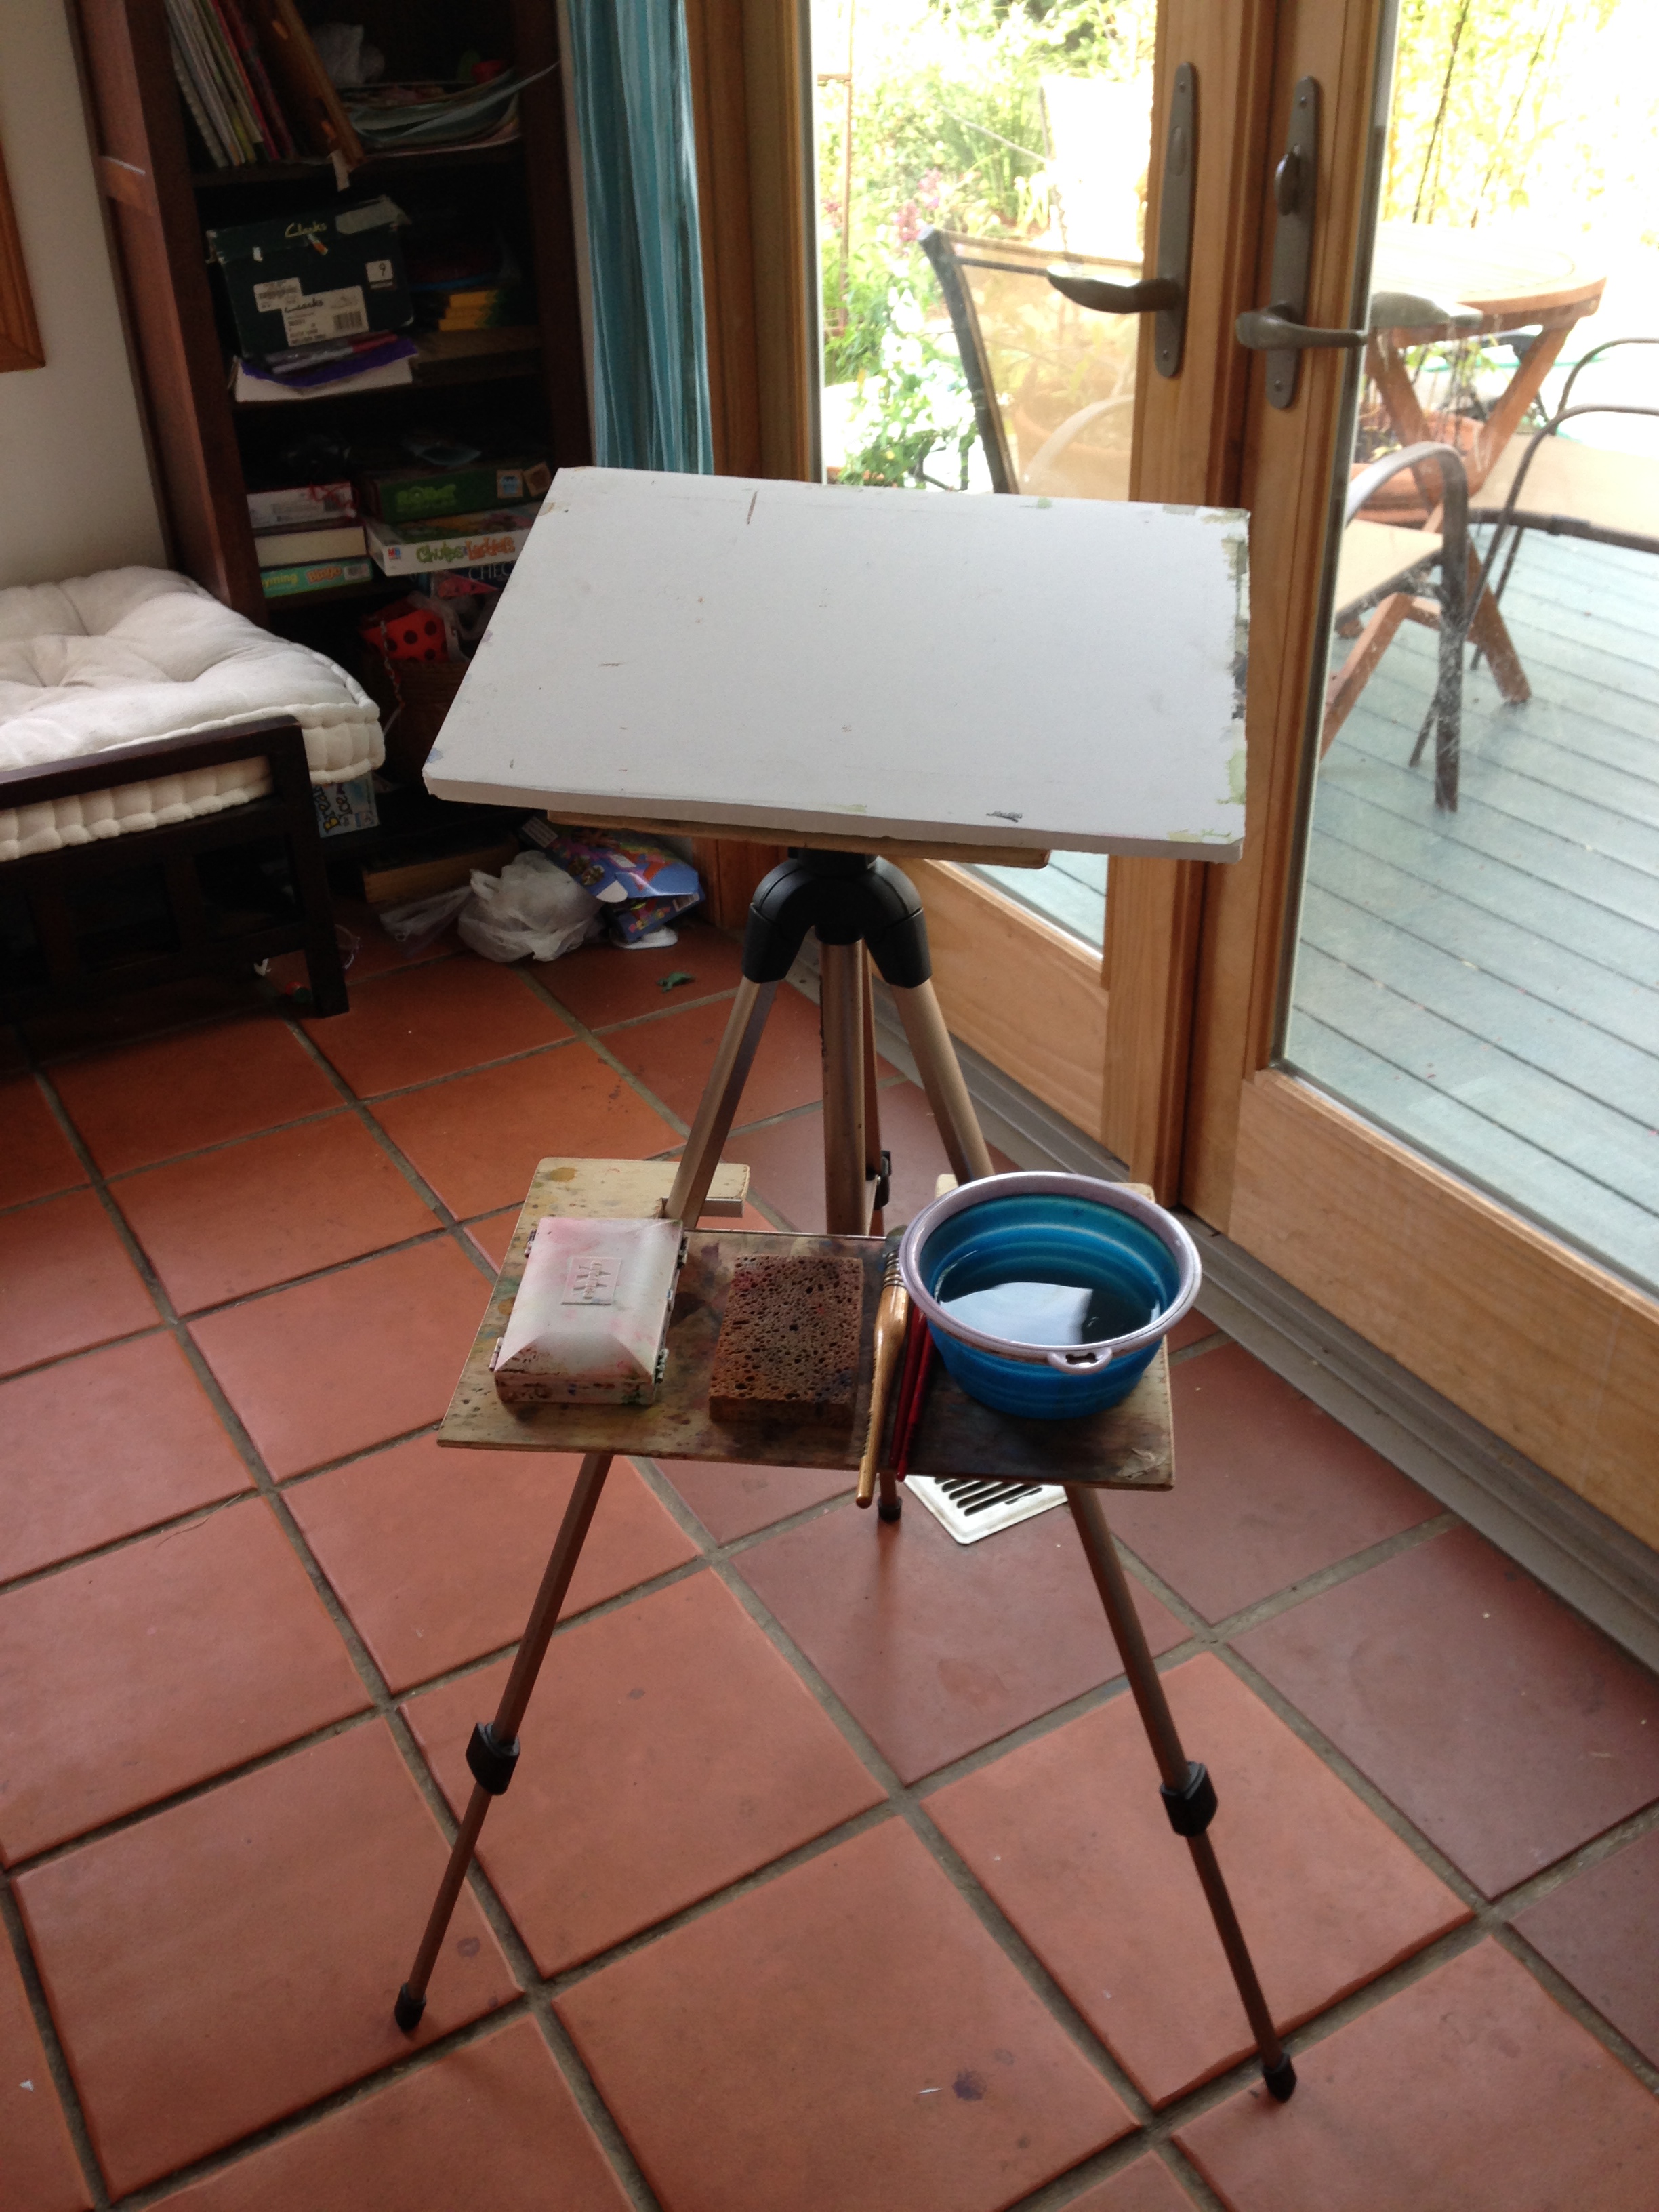
my first setup, from 3 years ago. everything is centered.

my current setup. in total, I have 9" more on the right, which allows me to fully access my palette. My shelf is also wider, which allows a second water bowl.
In this new setup, I stand slightly to the left, off-center to the tripod, but centered on my backing (since it's also off-center to the tripod). As I'm right handed, it works wonderfully. So, how did I shift the parts around?
Attaching the Backing to Your Tripod Mount Off-Center-
So, I use a sheet of 1/2" thick Gatorboard to support my paper (which you can get online from Blicks), with industrial strength velcro on the back (which I got from my local hardware store for 10$). That's how it attaches to what I call my tripod mount. Could I use the 3/16" Gatorboard, or a corrugated plastic backing instead? Probably. This is just the one I happen to have. The goal is a rigid, lightweight, modifiable material. What's of interest in the photo below is that I've rearranged the velcro to be off center- this allows me to shift the backing to the left, whether in portrait or landscape.

velcro re-positioned so the board sits to the left. Note the other side of the Velcro on my tripod mount. Easy to take on and off!
my setup with a 1/2 sheet on it, shifted partially to the left. The velcro is easily strong enough for this setup!
Moving the Tripod Mount to Be Off-Center-
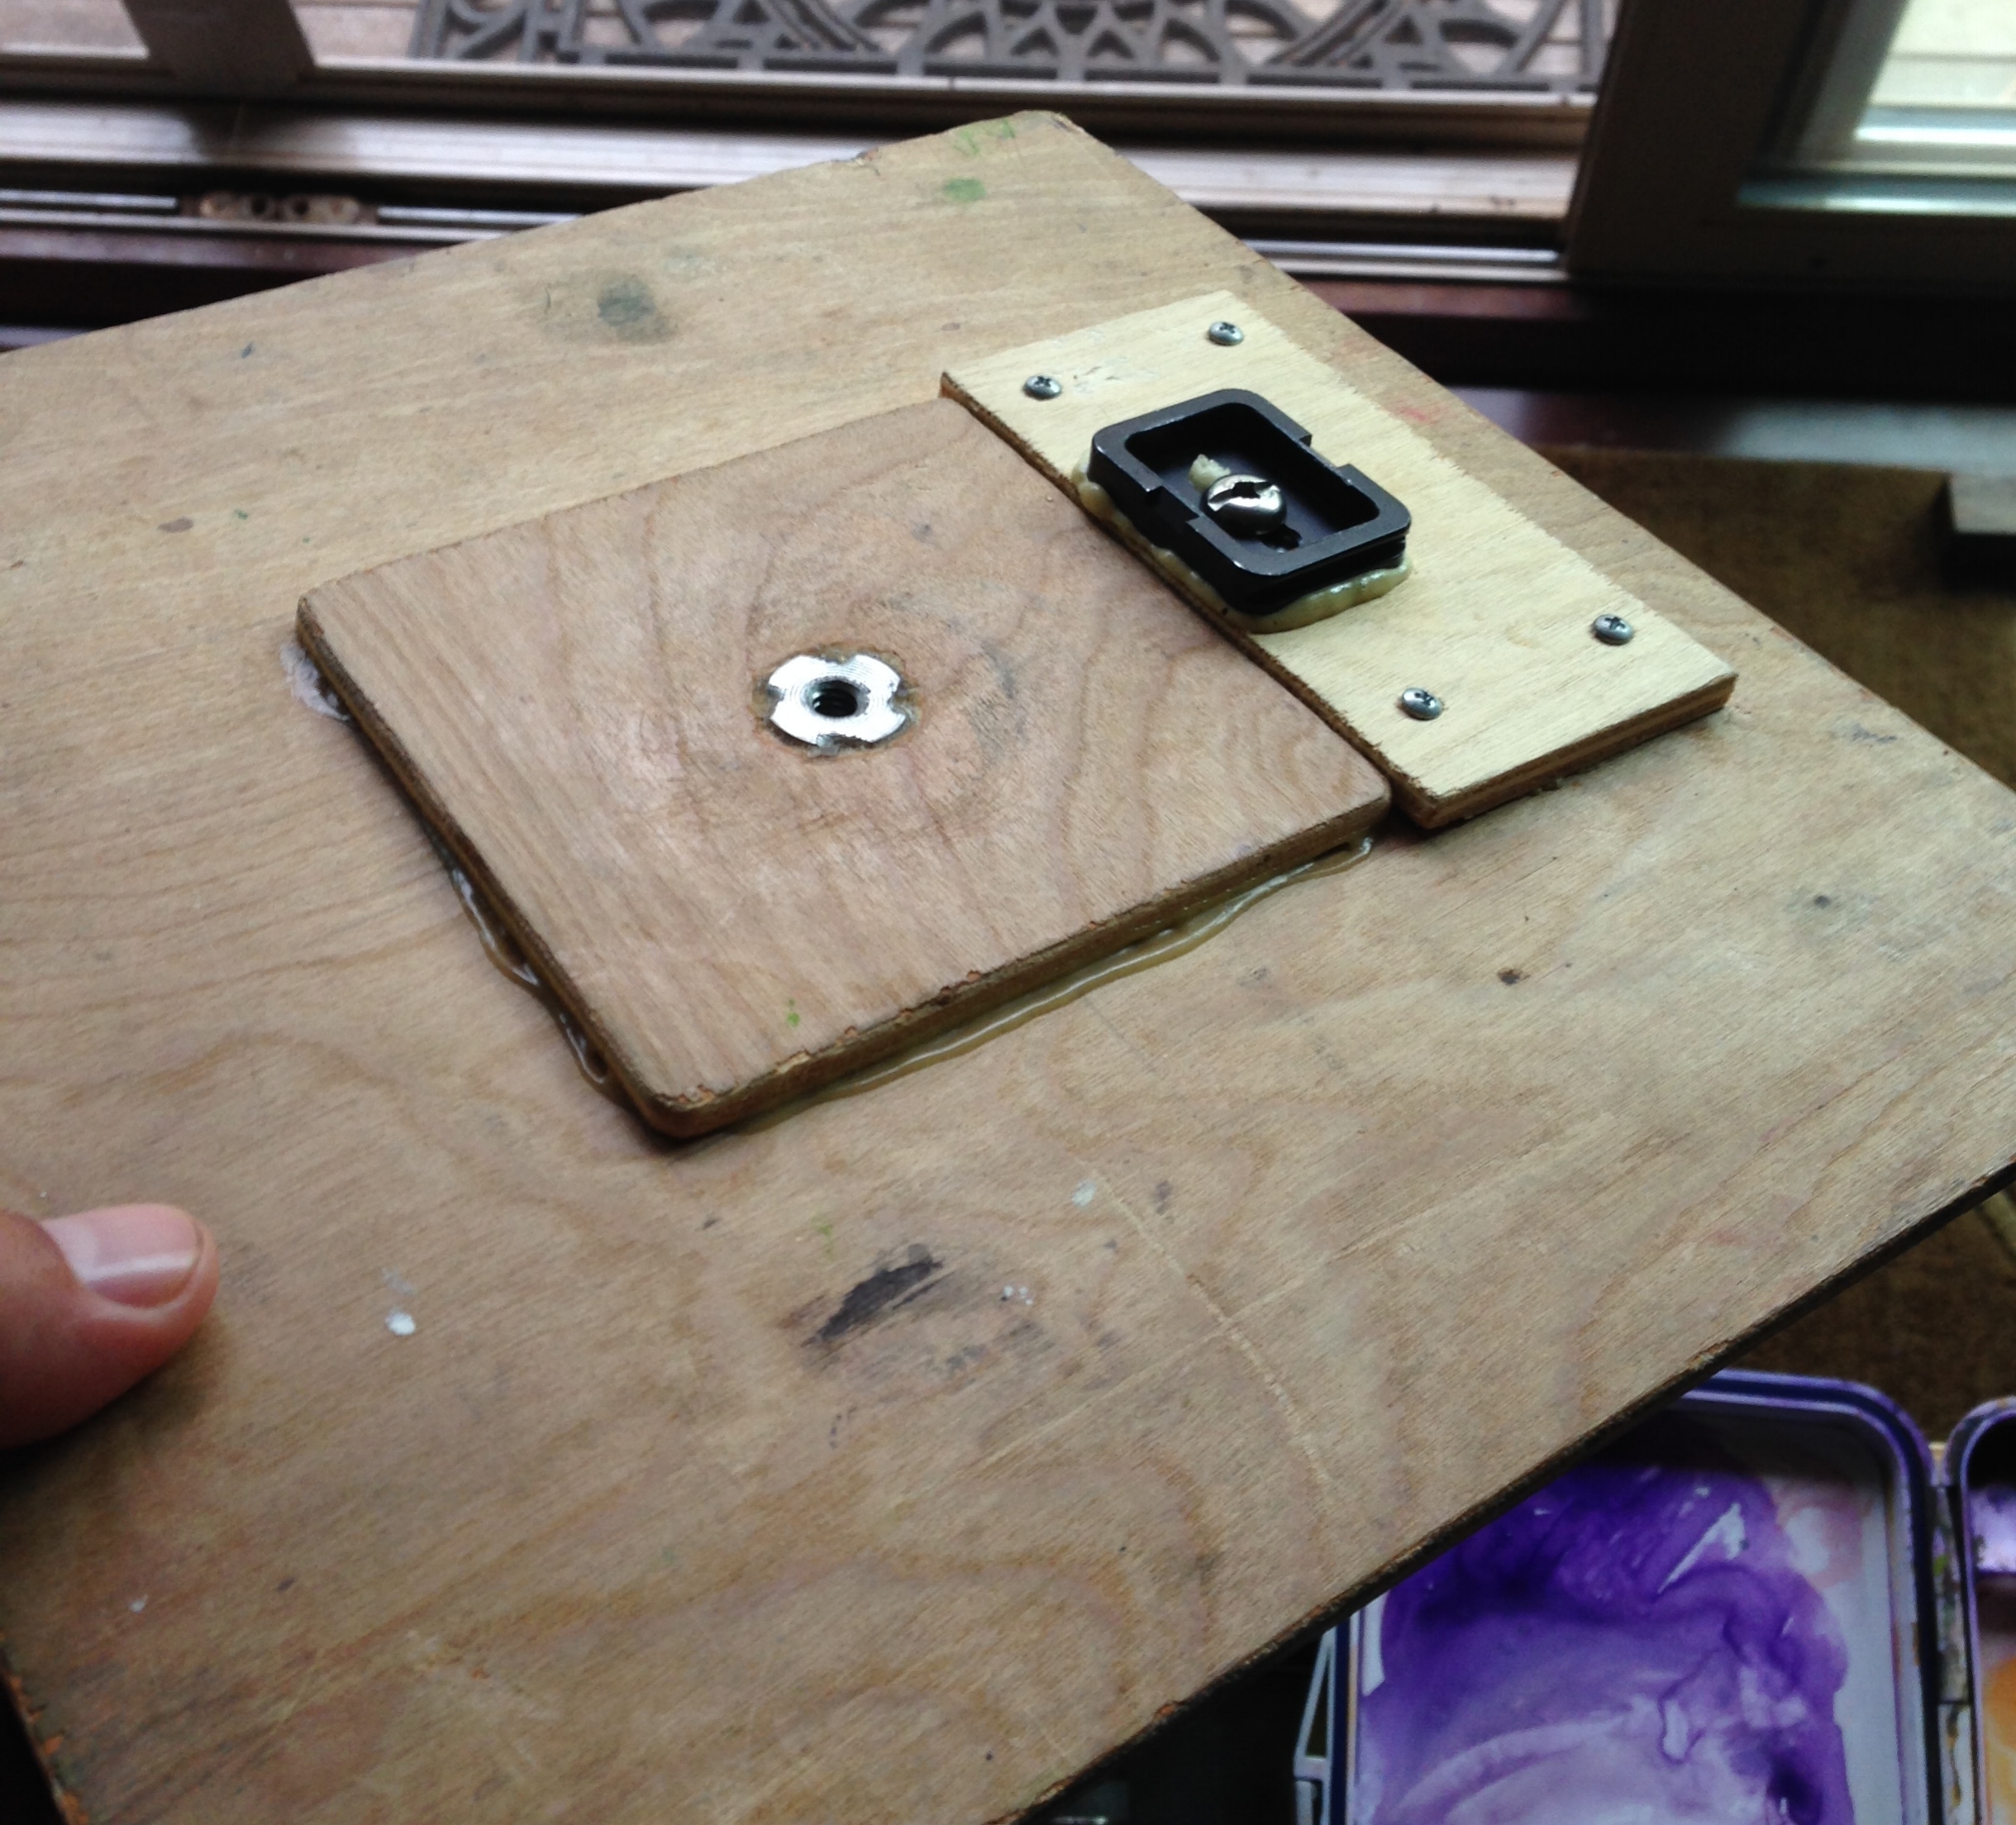
the quick release is now attached 3" to the right of the old threaded hole in the center.
This is what it used to look like underneath, before I off-centered things.


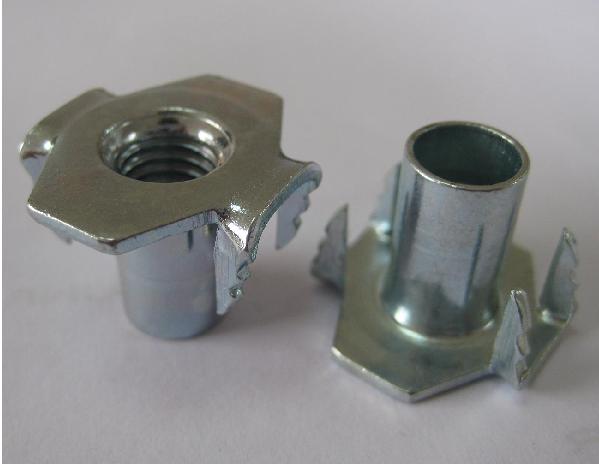
The process used to involve a T-nut (essentially an inside-out screw) and a special screw that went into it, and held the quick release in place. It worked, but what a pain!! It was hard to build and the screw often came loose. Bah! Then I had a revelation...
crazy t-nut

The t-nut glued into place.

the quick release, which comes with your tripod. note the all important screw!
What if I just glued the quick-release directly to the wooden tripod mount?!? No crazy inside-out nut that gets loose. No screw needed. Just attach the damn thing with a strong glue (like Gorilla Glue!), and be done with it. If you break it or lose it, the quick release piece is easy to get, and cheap. So no permanent damage done to the expensive tripod.
The old T-nut is like an appendix- just a remnant of evolution. ;) Not only do I not have to mess with that loose screw, but with the quick release now glued 3" inches to the right, I shift my backing a few inches over to the left, and gain a little bit more room for my palette down below to be visible.
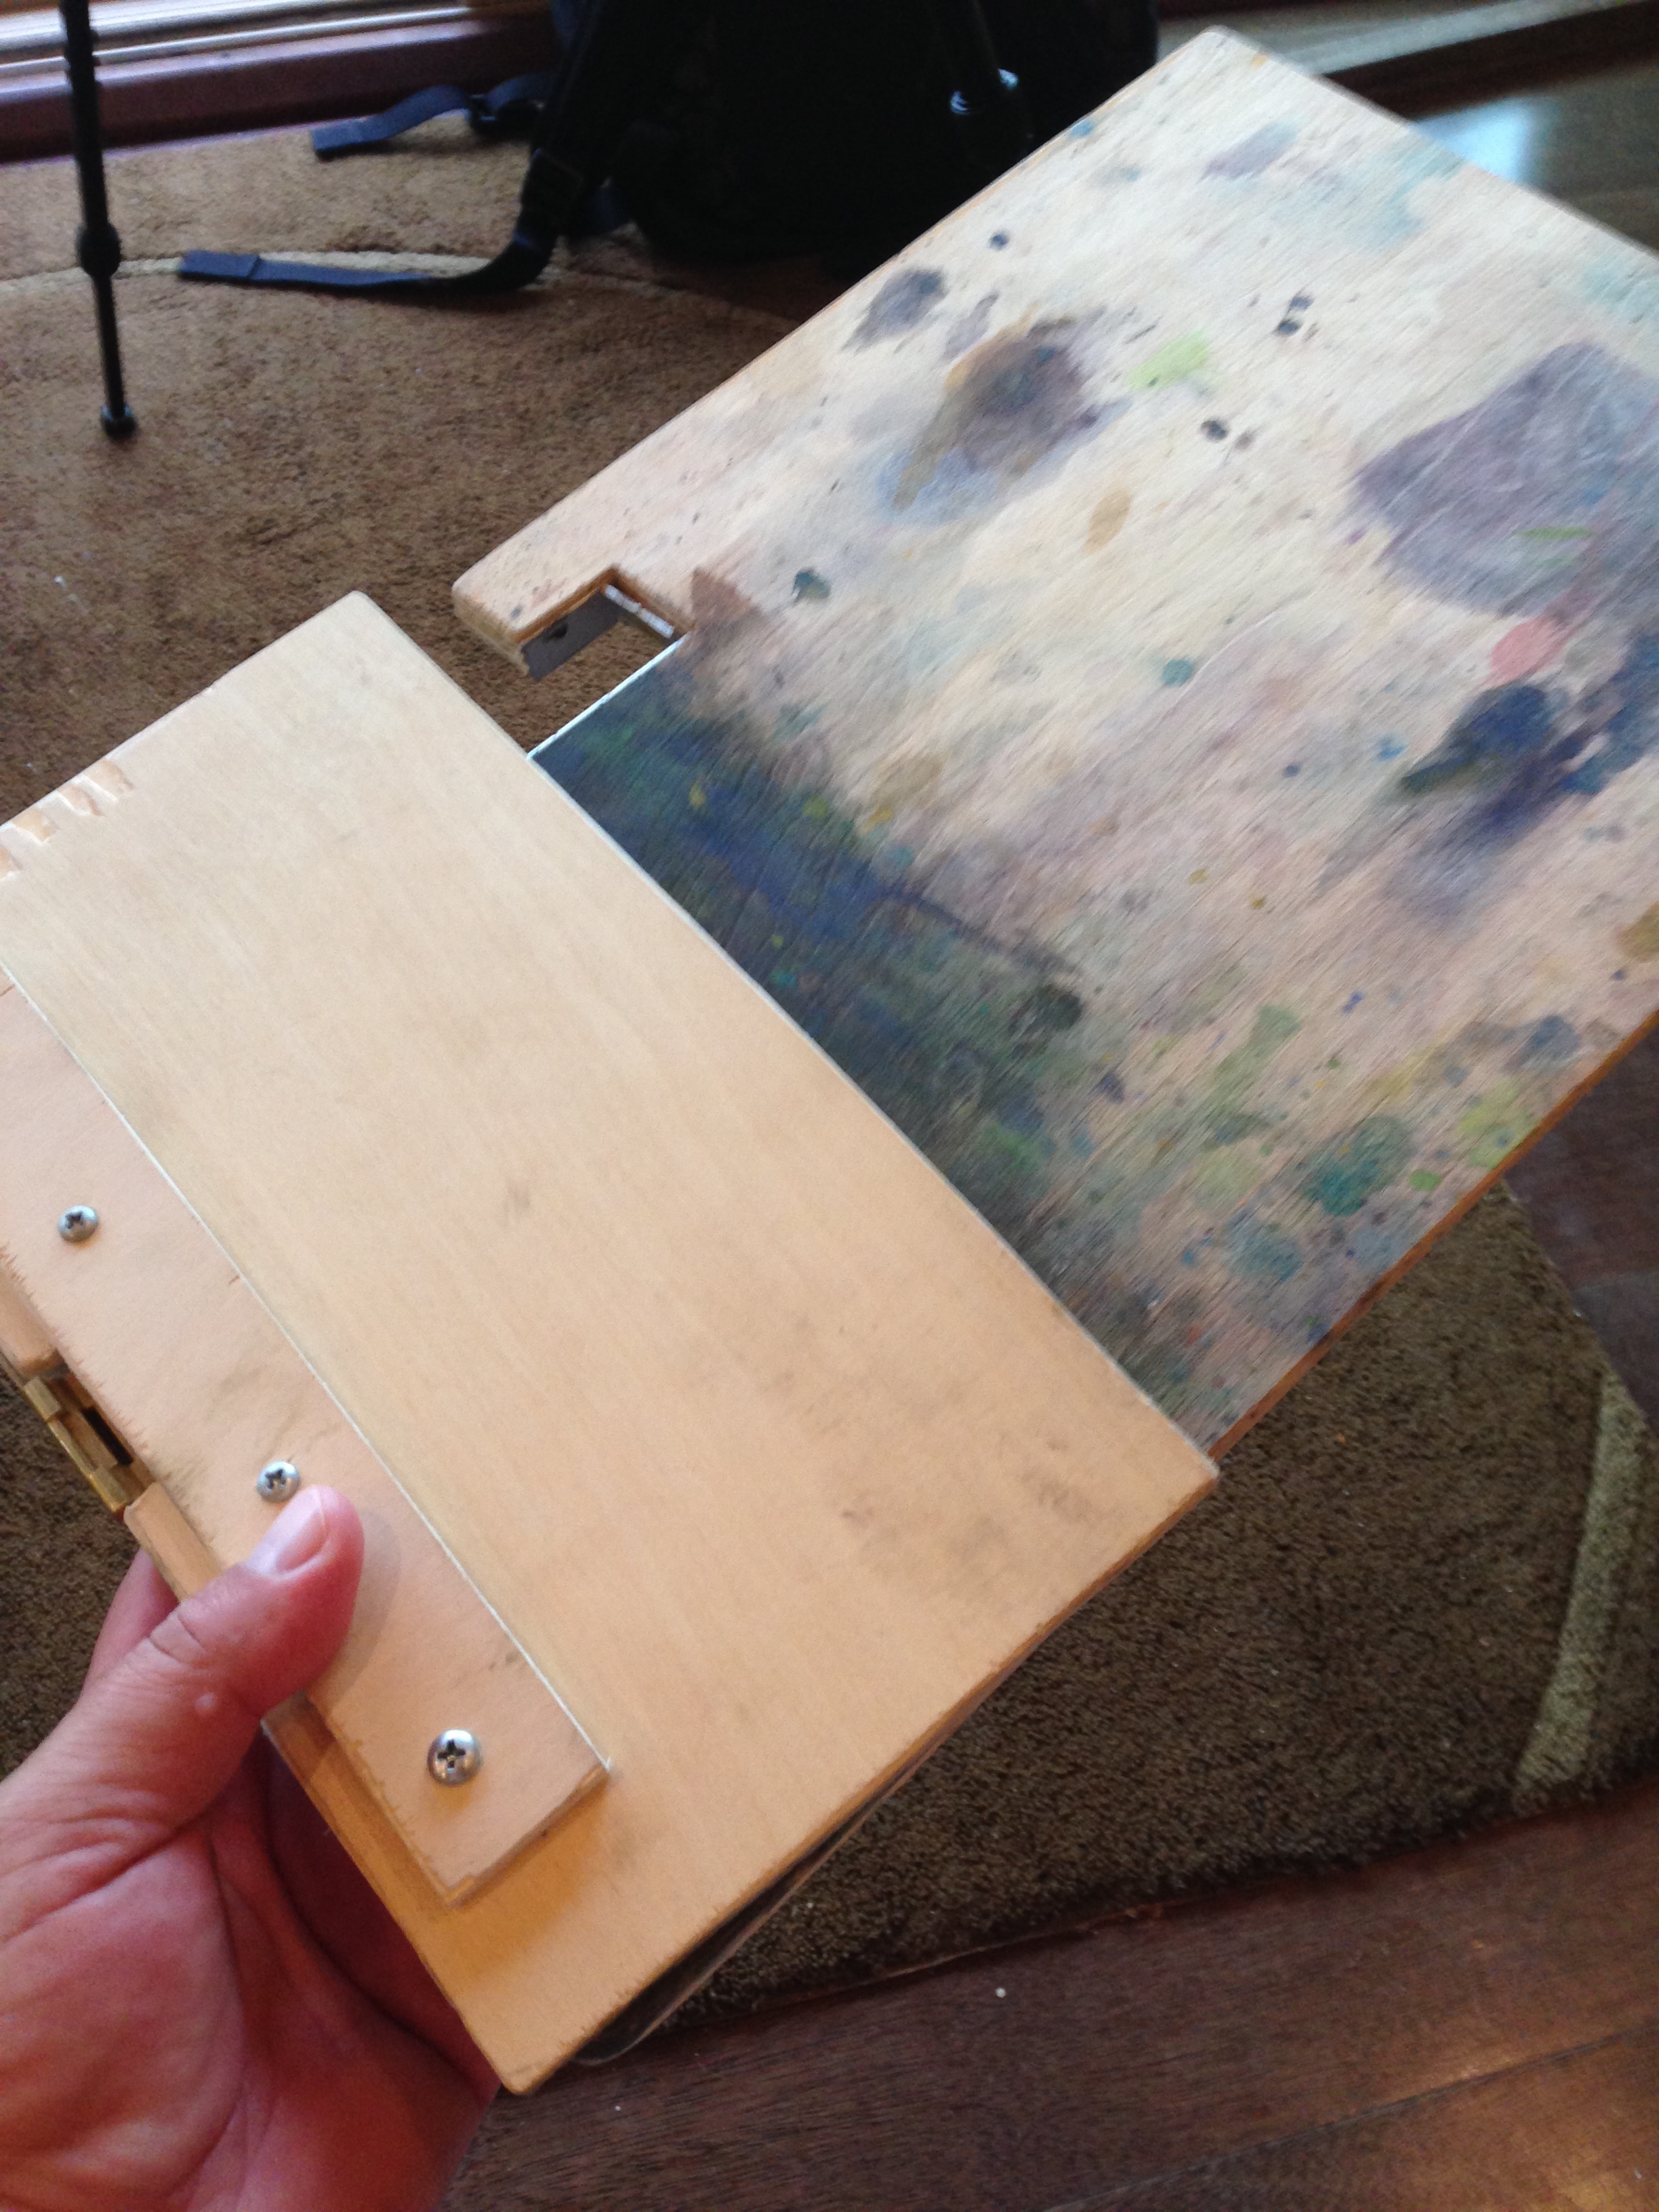
The New Shelf-
This is where I go full mad-scientist- I don't really do woodworking, but I know just enough to get myself into trouble. So, fair warning. I could imagine someone making the other two (easier) parts for cheap, but instead buying the Plein Air Traveler shelf if need be. BUT, as far as I can tell, that really only works with the SunPak Tripod (which is what the Plein Air Pro uses). As I moved to the lighter, smaller Sirui, it was time to upgrade my shelf with a newer handmade one.
Below are some close up picks of my shelf, with the new one on the left.

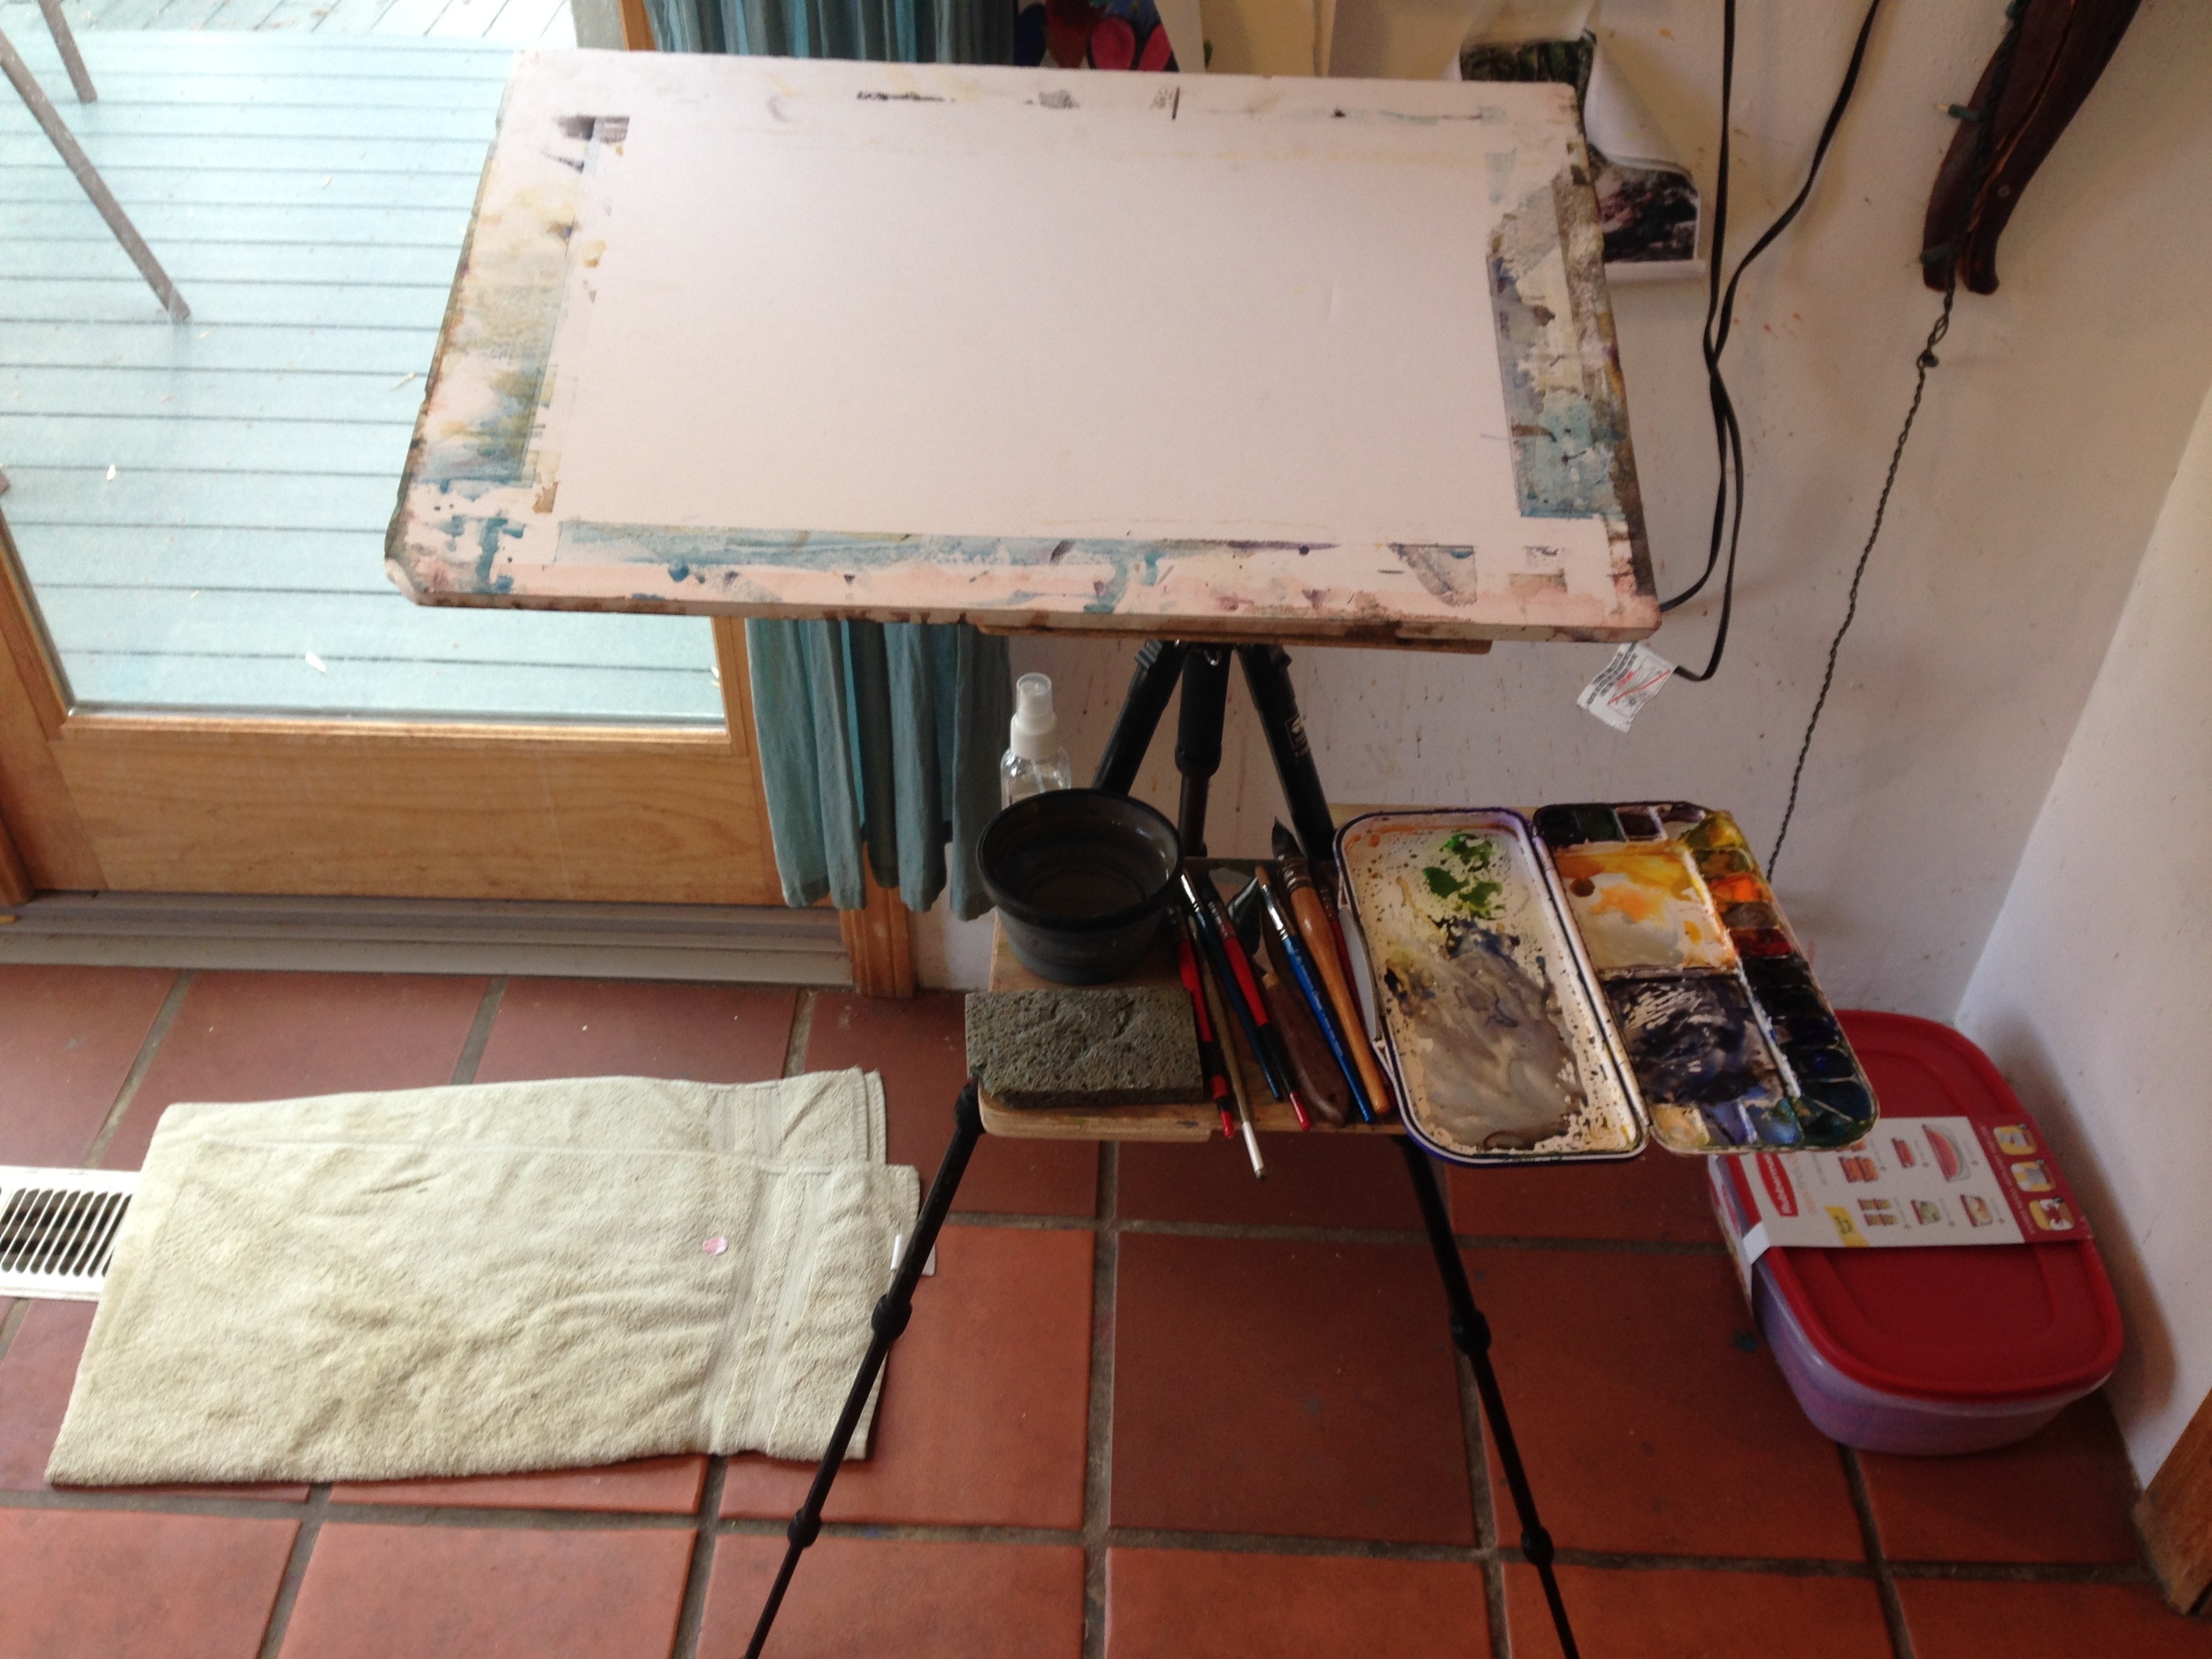
the big change is that the connection gap for the new shelf is now shifted to the right (when upside down).
It's made out of sections of 1/4" plywood, glued together. For this "model", it's 3/4" thick on what will be the left side (when it's right side up). The thicker, heavier section on the new version is to help counterbalance the longer cantilevered arm on the right- an important change, because the shelf will "tip" to the right if you don't balance it properly. You may notice in the comparison photos way up above that I now place my water bowls and spritzer on the left, instead of the right like I used to. I like this, because my palette is now closer to my right hand, but it also helps with weight distribution. If you press down hard, the shelf will still tip to the right, but I've been painting with this new set up for almost two years, and I've not had a catastrophe yet.

I've put small lengths of aluminum L-brackets against the wood, where the shelf rests against the tripod. It's light and strong and not expensive. Older iterations didn't have this, and the wood slowly indented from the tripod digging in. This led to my shelf slowly starting to tilt more and more forward. So... the aluminum L-brackets were a necessity, which I also got at my local hardware store. They're a few bucks. I just cut them to length with a hacksaw, drilled a hole with my power drill, and screwed them into place with shallow screws.
Now for the fussy part.

For those who are interested, my shelf is 17" x 10"- a measurement I came up with because a) it fits in my backpack, b) I didn't want it to jut out too far forward, so it wouldn't bump my legs and I wouldn't have to lean over, and c) it still had to fit my water container, sponge, palette and brushes. Rounding the edges helps it fit in my backpack better, and keeps me from stabbing myself in the leg! :PThe little cutout section (only measuring the empty spaces between the inside edges of the aluminum L-brackets) is 15/16" wide front to back, and 6 1/2" wide left to right. Did it really matter if it was 15/16" or 1" wide? Yes, in the end. Why? Because that's how big it needed to be to fit on my new tripod at a ergonomic level. If I made it wider than 6 1/2", the shelf would sit too low. If I made the opening wider than 15/16", the tripod would tilt forward and not be level. At 3/4" wide, it began to tilt upwards. !! Anyways, these measurements work for my new Sirui T-005KX tripod.
When I had the older tripod (a Sunpak 620-020), the measurements were different- the legs of the tripod were thicker, and they spread out at a different angle. For those who might get one of these cheaper (but still really very good!) tripods, the measurements had to be 1 1/16" wide front to back, and 7 3/4" side to side. So, it's not universal. It changes from tripod to tripod.
The other thing I did was install a self-supporting hinge (also called a flip-top hinge, or a butler tray hinge or a sewing machine hinge) to give me a folding out shelf on the left. This allows me enough room for that second water bowl. All combined, I have 23" of shelf space, laterally. Self-supporting hinges are very cool!! It looks like this once finished-


Equipment Upgrades-
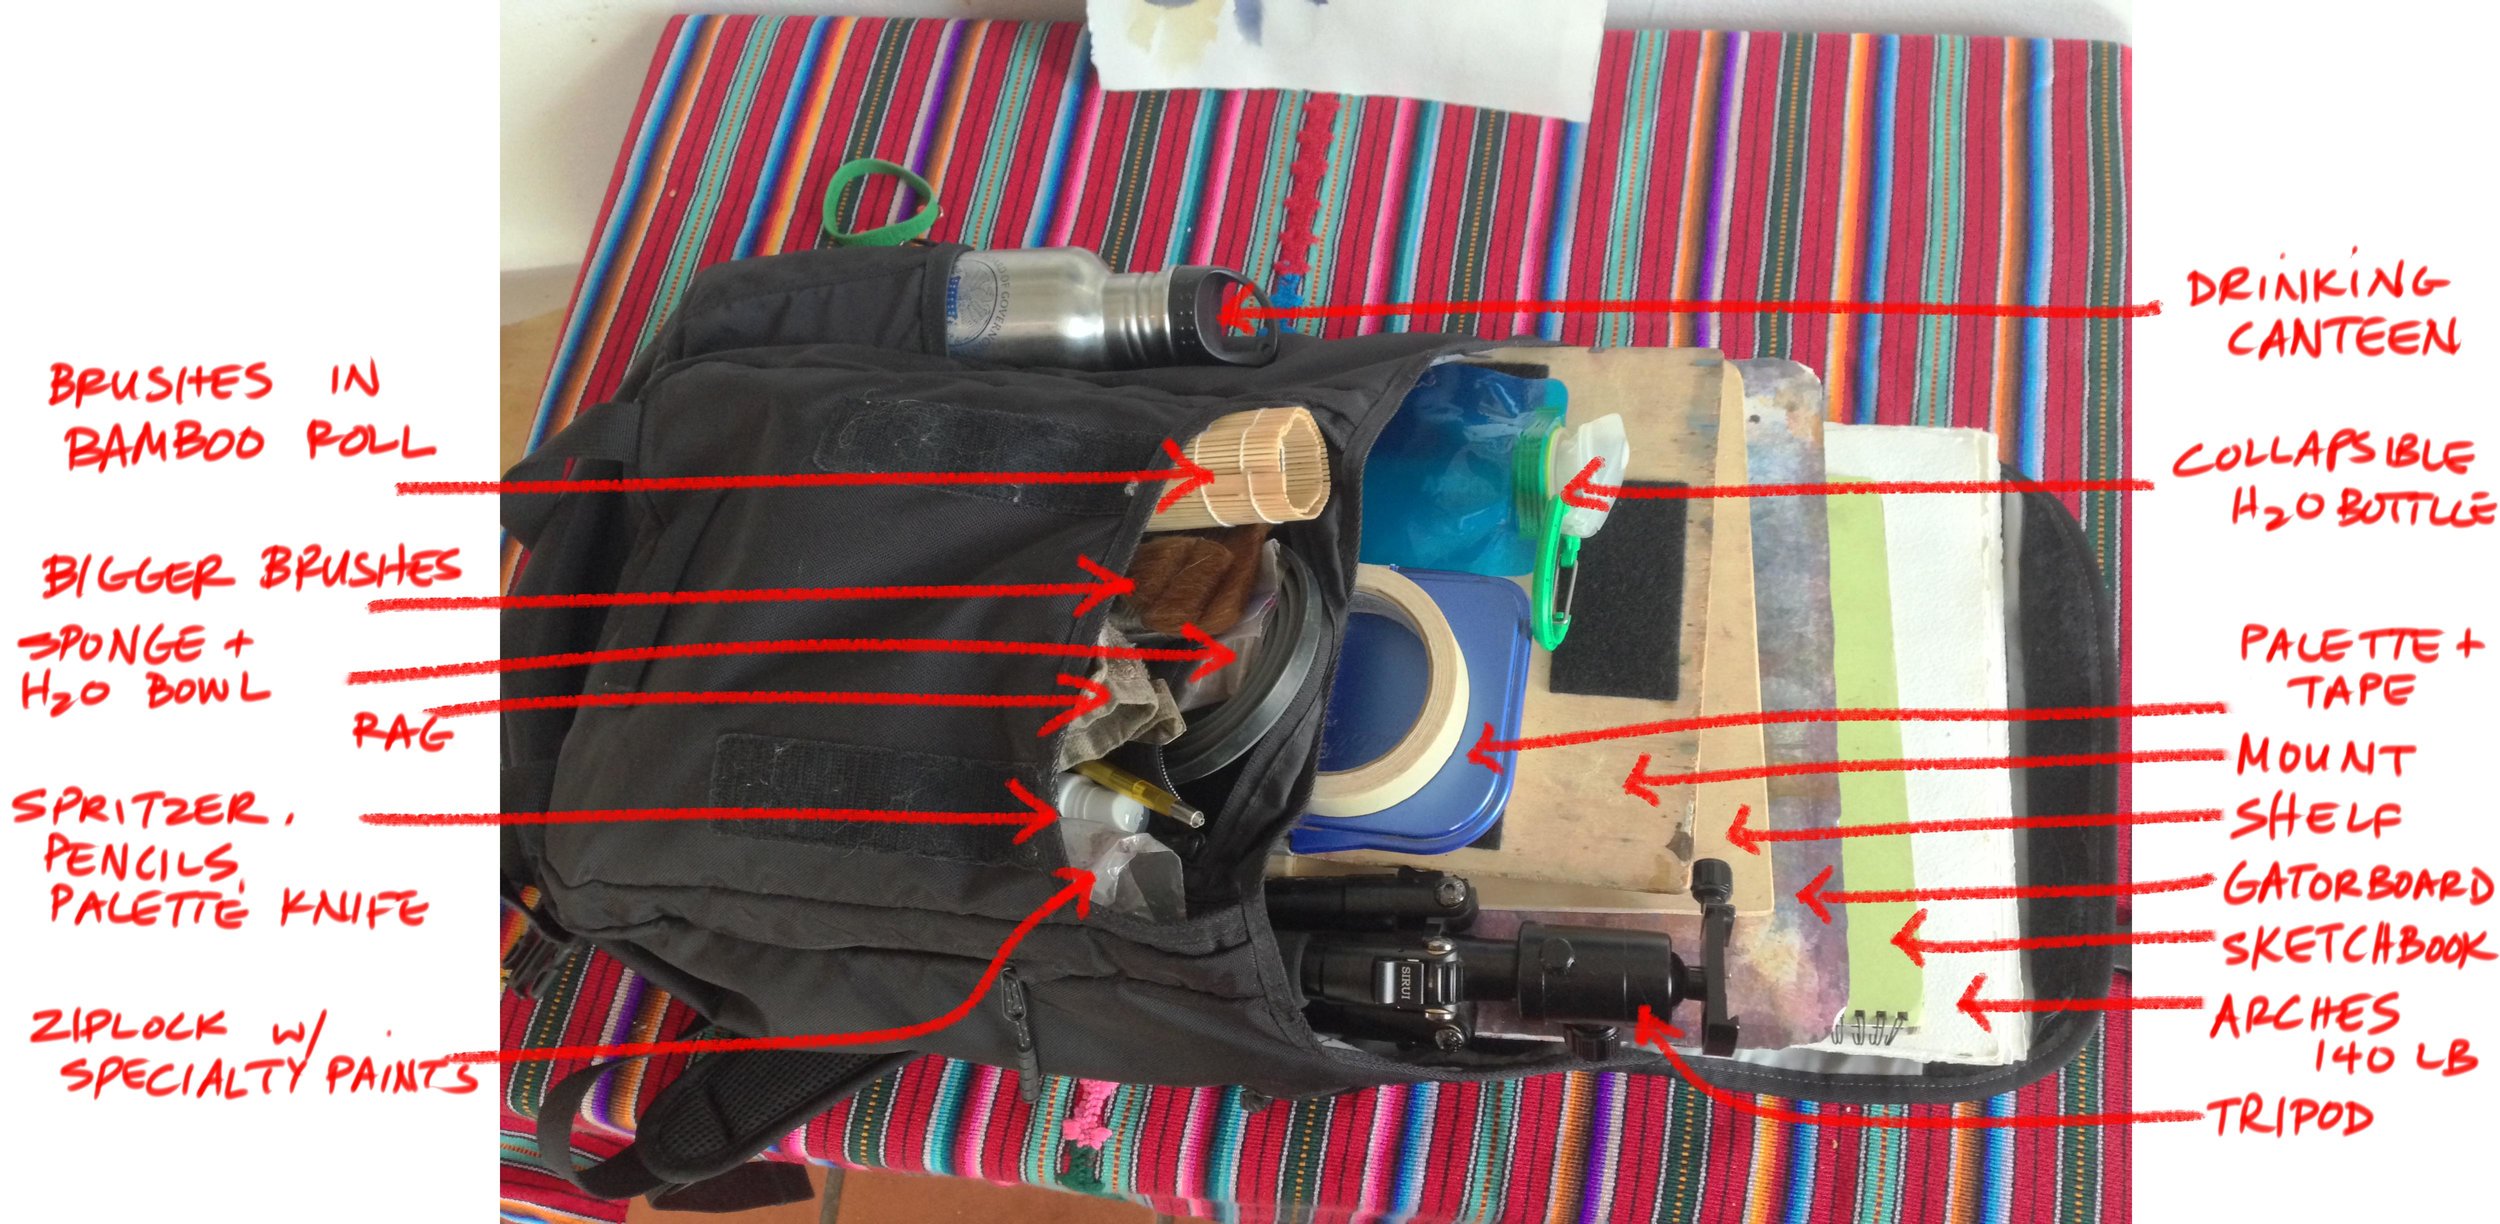
I just wanted to note some of the new things I'm using here. A new palette, a backpack, etc.

I gotta say, for 10$ this thing is fantastic. Nice plastic palette, that doesn't stain too badly. Is it actually air tight? No. But it really does help with leaking. Nice arrangement of wells too- they're like full pans, and are sloped, so you don't have to dig in there with the tip of your brush. One side has two big wells for mixing up alternate washes in, and the other side has a big fat mixing area. It comes with a little pull out tray for more mixing space. I threw mine away. But the rest is awesome, and such a great deal price-wise for what you get. It's also very light weight, which I greatly appreciate on my shelf and in my backpack.
My Paints-
People sometimes ask, so I wanted to include this. I go into great, probably nauseating, detail about this in a post from May 2016. That's a good place to go to find out not only what I use, but why I use it. Oh, and there's a mistake in the image- I use Jaune Brilliant No.1, not No.2. My boo boo on that one.


Haha! I love this thing. It's much smaller than my older backpacking one, and costs less, at around 75-100$. And yet, because it has a square top with a very wide mouth, it allows for things like a 1/4 sheet rectangular Gatorboard to fit in it very easily. It has many pouches and pockets and sleeves, which I love. It fits A LOT of stuff. :D I'm in luv.
Brushes-

Just to say, I'm using brushes similar to what I have used in the past. The same Castagnet brushes from a number of years ago, although the #0 and #00 had to be replaced because of use. I'm using an Escoda Perla for my final detail work. I've moved from the Davinci to 2 Isabey brushes of similar size- also squirrel. The Roubloffs are a new addition. They're a Russian company that I stumbled into getting a few of- they're a Sable/Synthetic combo- or so I think. The carry a bit of water, have a very fine point, and a lot of spring.
I'm probably asked more about the red-handled Needlepoint brush that Alvaro Castagnet uses than any other tool I use. It makes stupendously expressive marks with a very fine, flexible tip that has comes to a long sharp point. This section of the brush is made from very "snappy" synthetic hair. What makes it so special is that it also has a fat belly made of squirrel hair that holds a lot of water. This makes for a very versatile brush- you can make very very long fine lines, or rough smooshy shapes as well. His is a #8, but more importantly is 4mm wide and 1" long. They're available from Alvaro's website, and only available from the website. They run about 40$. Also, here's some alternatives I've found-
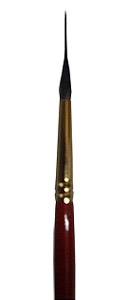
Alvaro's Needlepoint #8

Mont Marte Fat Liner Set

Escoda kolinsky Reservoir liner
This can be purchase on Amazon, but it ships from Australia and looks like it will also take a long time to arrive. It comes with 3 different sizes, and is about 45$ total. They look pretty good though. I've not used them personally though. You can buy other very similar brushes, but (as I discovered) they're all from Australia. Why? I dunno. As such, this one you can atleast buy on Amazon, so it gets my recommendation.
Escoda Optimo Kolinsky Sable #8 Reservoir Liner-
This is availalble from Dick Blick. I don't own it but I've used one. The tip is shorter and less springy (as its all natural hair), it made nice lines with a lot of variety in line weight, and it had a lot of water to do it with. All in all, a good buy. About 40$.
You can buy similar brushes, named things like "Inlaid Reservoir". Davinci makes one that you can buy from Blick, for example. It looks nice too, but is more expensive than the Escoda.
And I think that covers that for now. In the next post, I'll be sharing some setups I've seen from other painters on their blogs. It's good to get some perspective, and to see how others are tackling the problem.