Recent Plein Air Work


I recently took a workshop with Joseph Zbukvic, in which we did a lot of plein air work. I've followed up with some work on my own these last two weeks. I wanted to share the work, as well as some of the process behind its making.
These first two were done up in Petaluma at the Great Petaluma Paint Out. This was really fun, and I can't stress enough what a pleasure it was to get out there and chat at the reception, socialize, and make connections with the other painters there. It's easy to paint in a vacuum, and this helped me get past that.
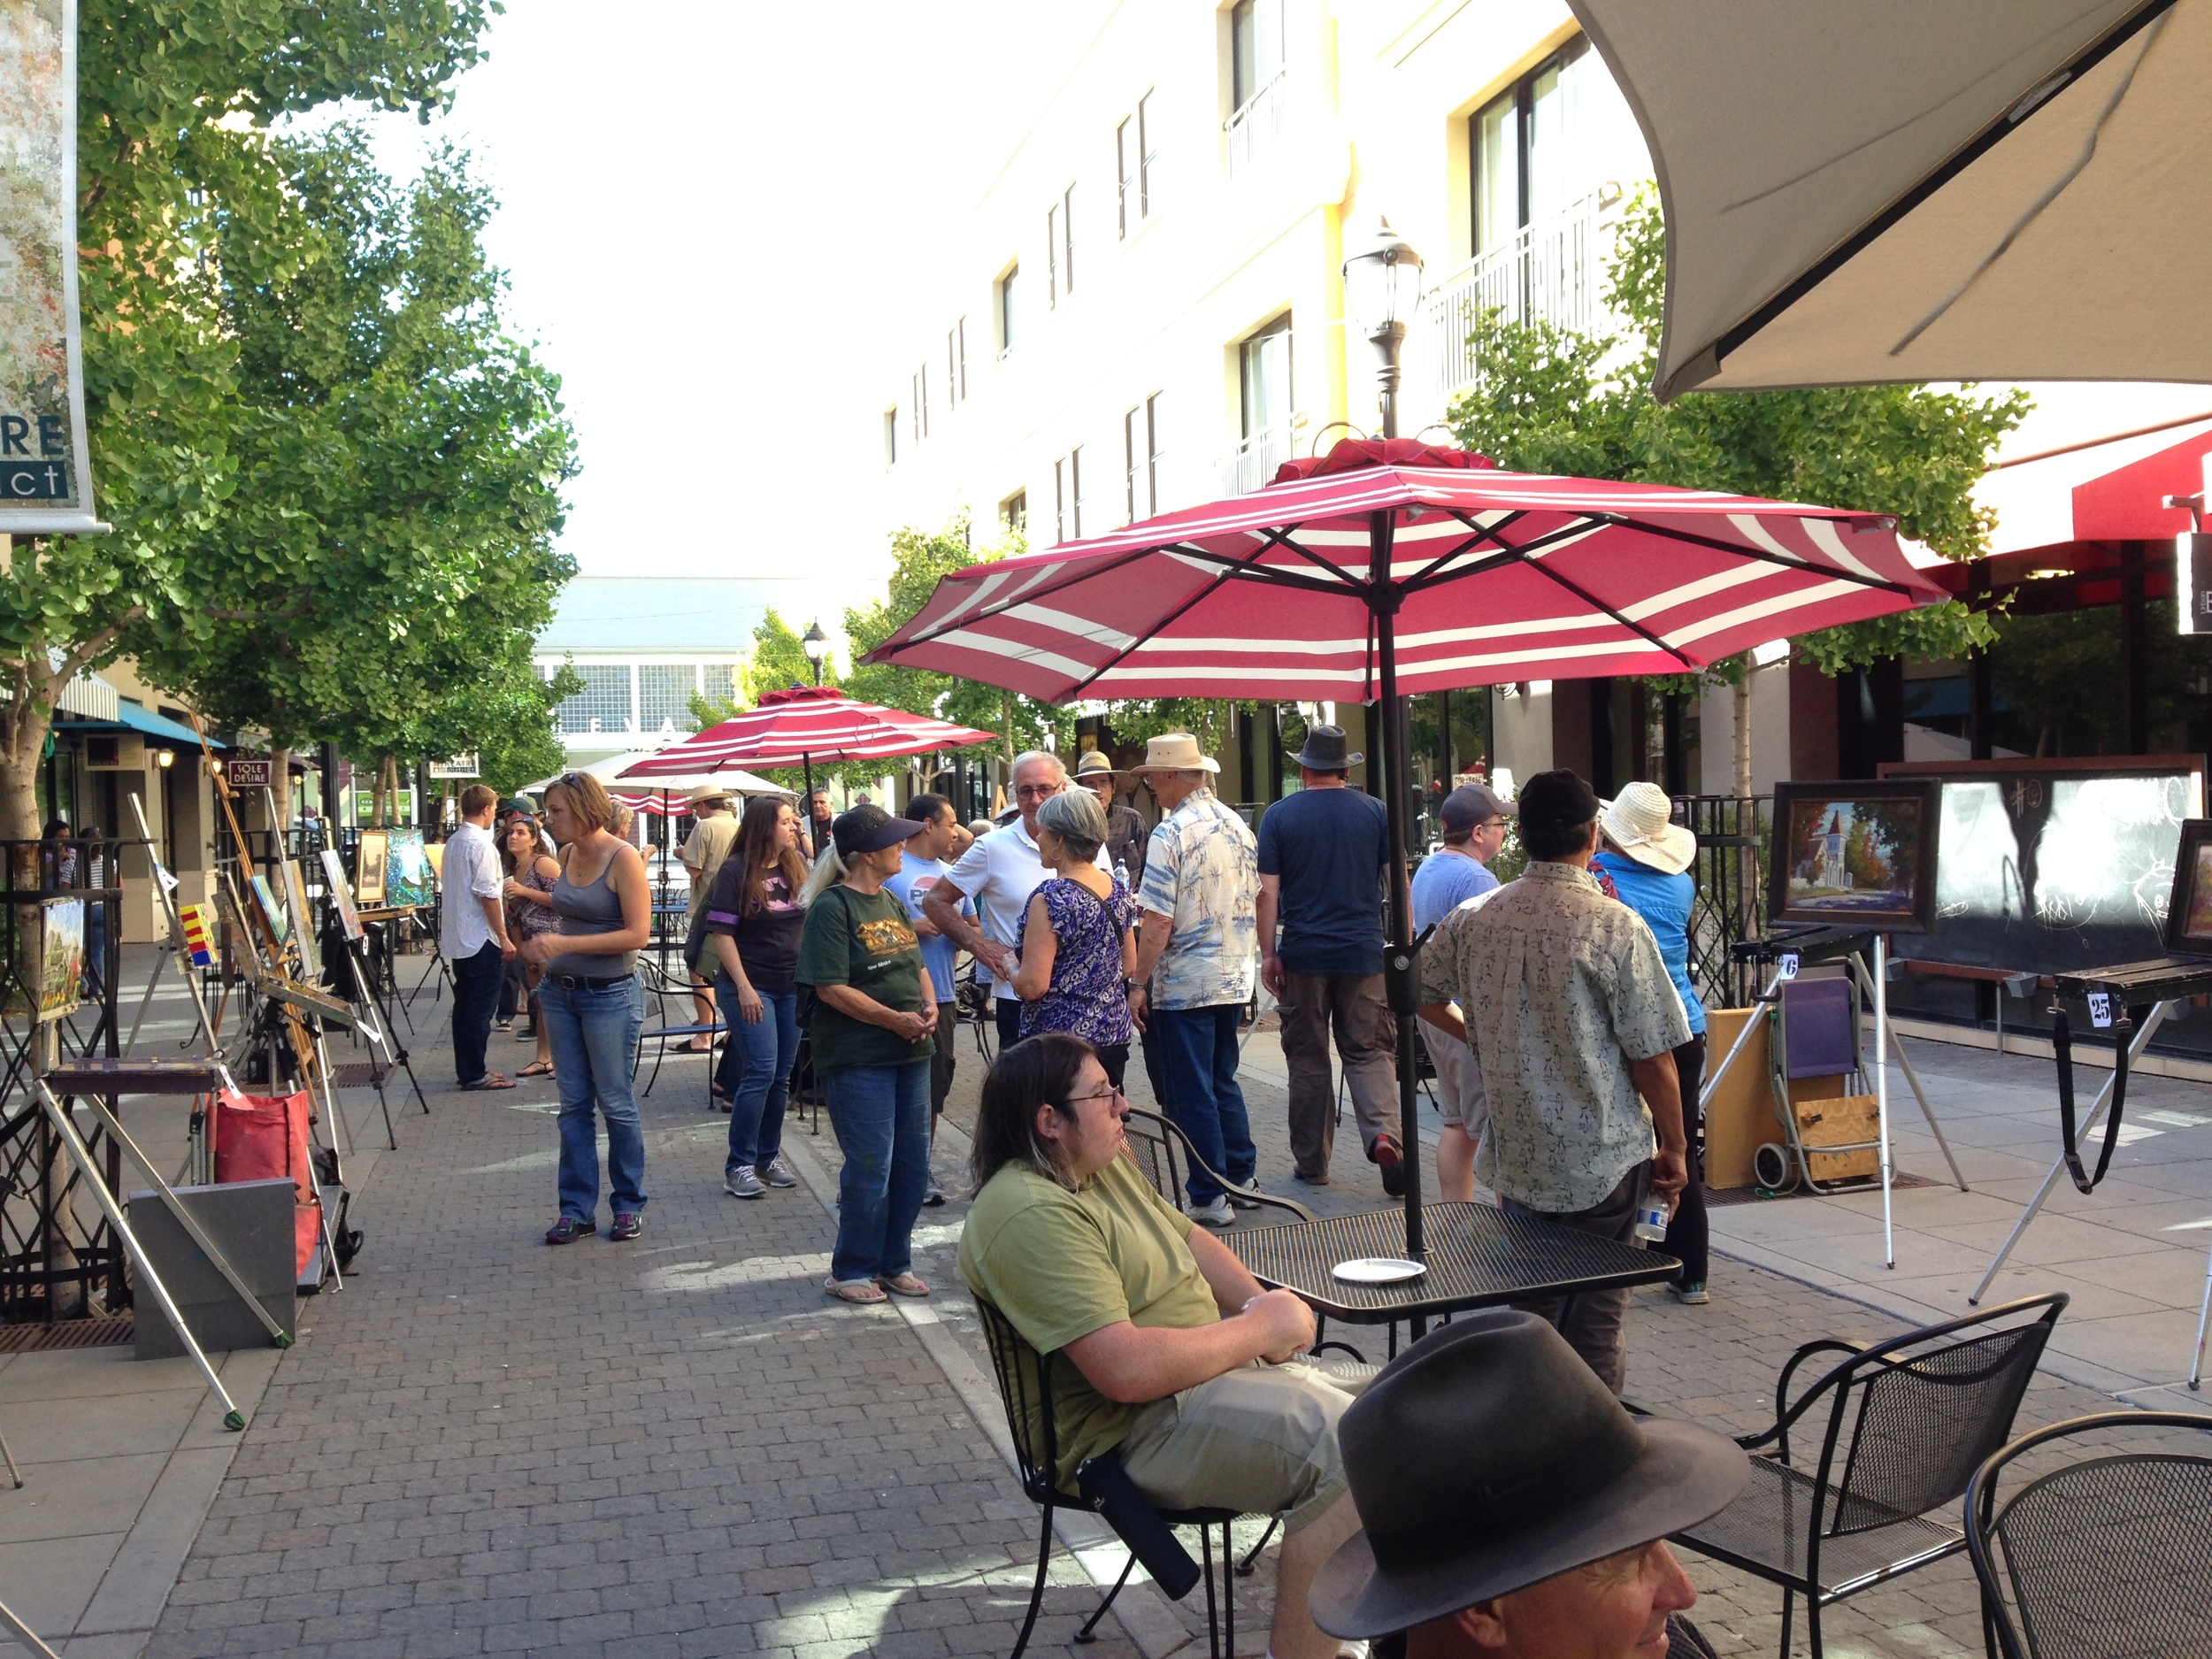
Here we all are, chilling and socializing at the reception. Super fun!
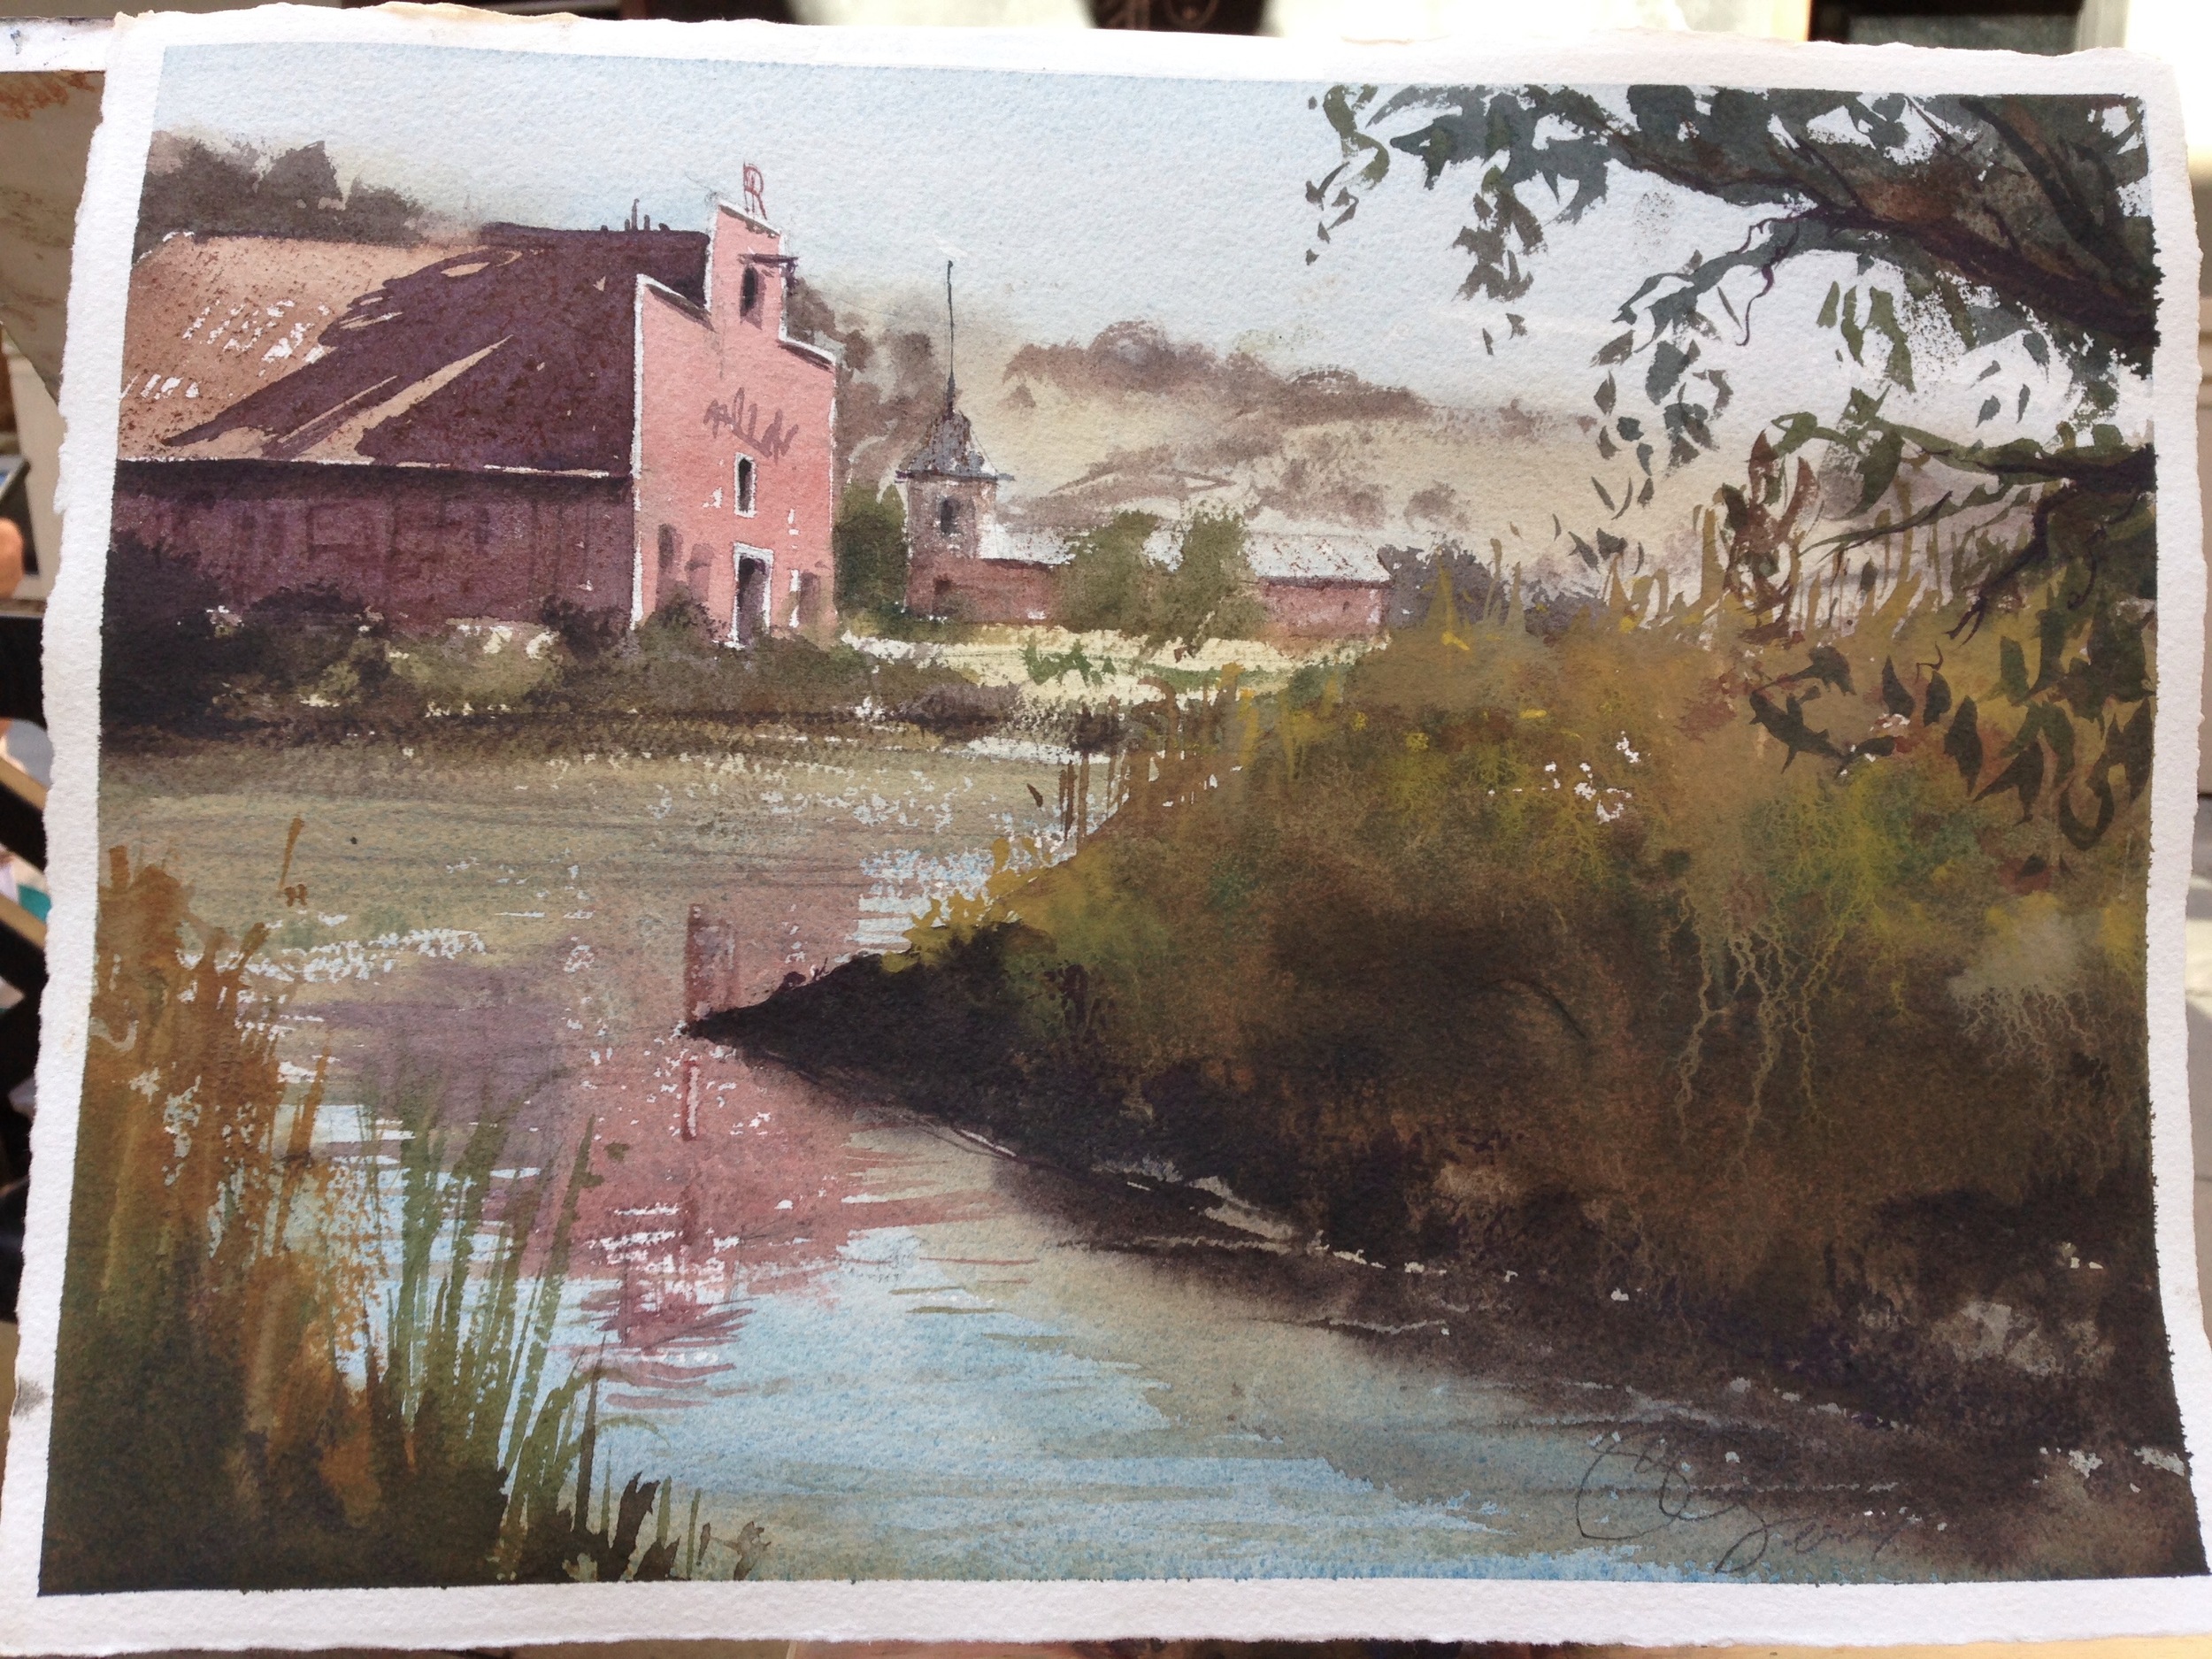
I drove up early (800 am) and patrolled around for a site, when I found this view. Sweetness!

I remembered a lot of what Joseph said about how "choosing your subject is the first step of painting." The location was shaded, and would remain so, the subject (the building and its reflection) was clear to me, it had a raking light on the roof, and I really enjoyed how the foreground led my eye in, and had a value scheme similar to the midground and background. I then did a quick 5-minute sketch, to get a handle on things. Here's the sketch and the painting, for comparison to the site. It's worth noting that the sketch is a fluid process, where I can change the composition as I go. You can see that I originally thought I'd just focus on the building- there' s a little rectangle for the first version. Then I stretched it to the right more. Then down some. Then, yep! I got everything I wanted to include, and went from there.


Of course, then I had to paint it. Yikes!
Much like I'm sure I'll talk about in my upcoming posts on the JZ workshop, I approached the work much as taught. 2 basic layers, light to dark, preserve your lights, know where to keep it tight and where you can let loose. The first wash covered the whole painting, top to bottom. It included the sky and the blue of the water, as well as the areas under the landmasses in the foreground. The only thing cut was the bright face of the building, where there is a sharp white line around it. Wet into wet, I dropped the soft mountains in, and then the distant trees too. Then I let it all dry. Next was the primary building's llghtest values, the distant building, and the reflection in the water, all wet on dry. When they were dry, I went and did the foreground , the shrubs along the riverbank, and the shadows on the structures. The entire "arrowhead" berm on the right was done wet into wet, with lots of different hues and values smooshing around and running into each other. I then added a few dry brushstrokes on the surface of the water.
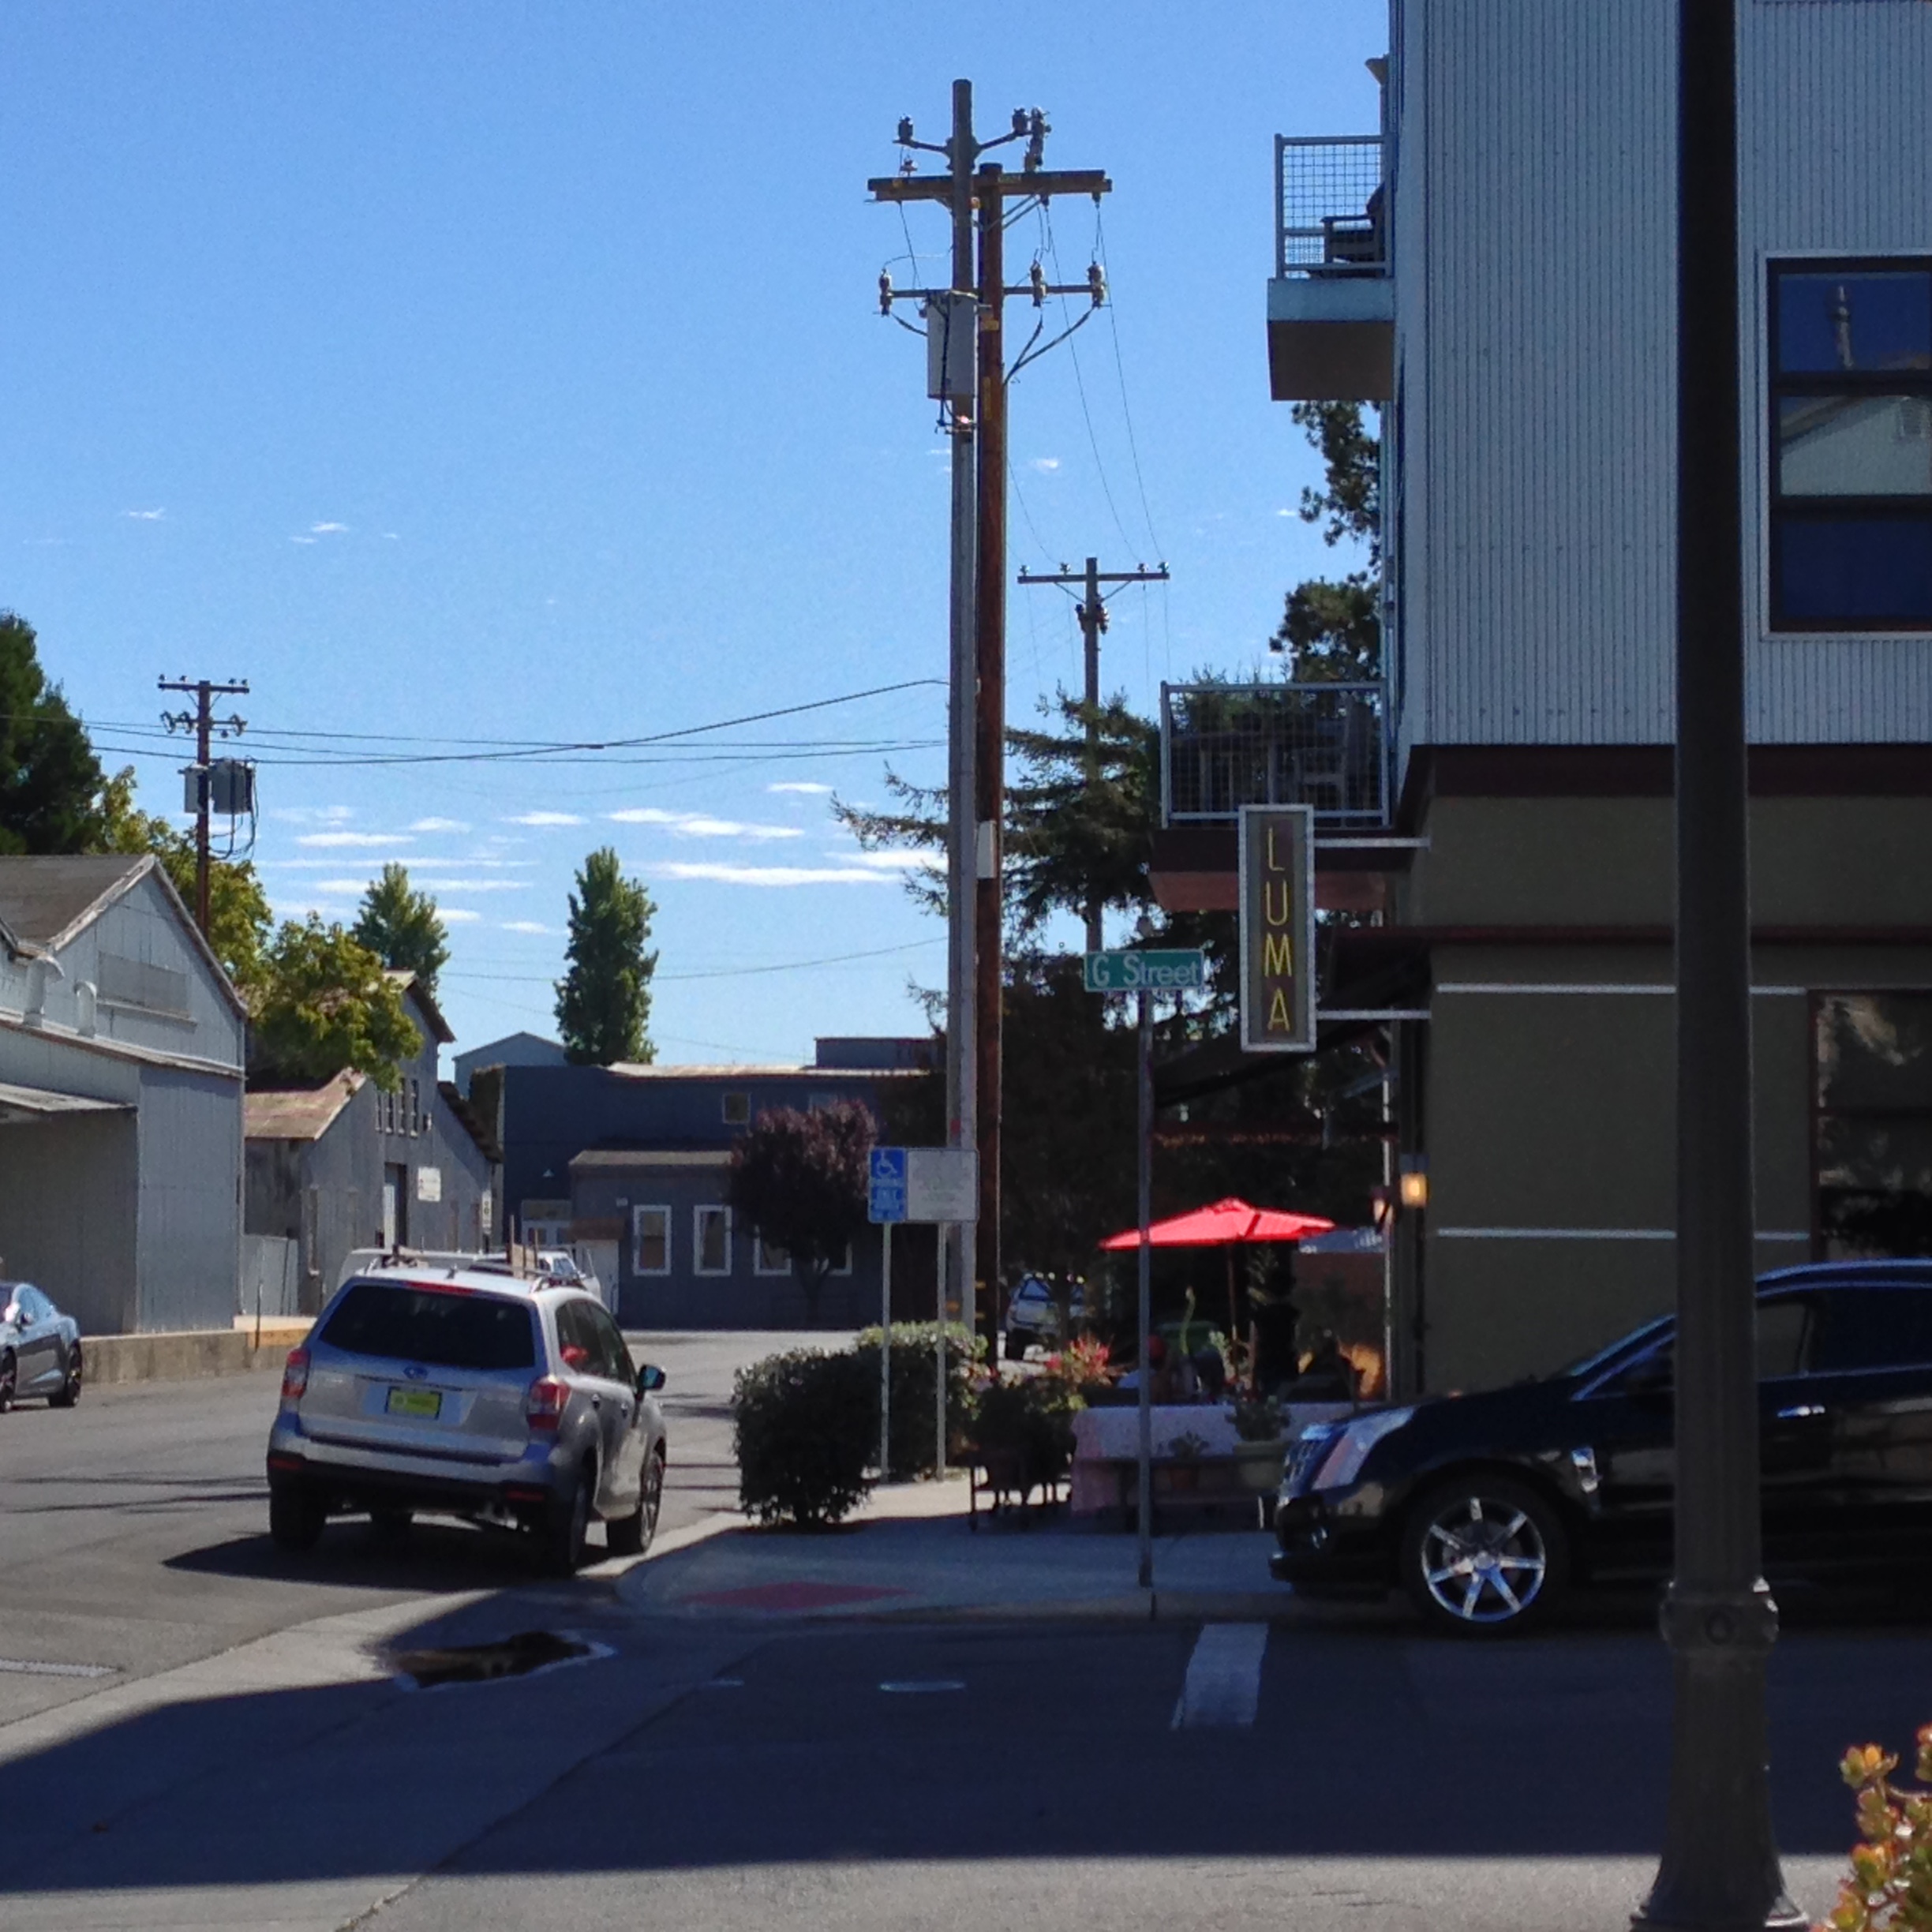
This second location was just down the road. I saw that red umbrella all lit up, and knew I had to paint it. Then I went and ate lunch there too! Yay!
Again, I did a preliminary sketch. I decided to remove a few things in the way, and focus on the people I saw coming and going- dog walkers, families visiting friends and eating brunch, etc.

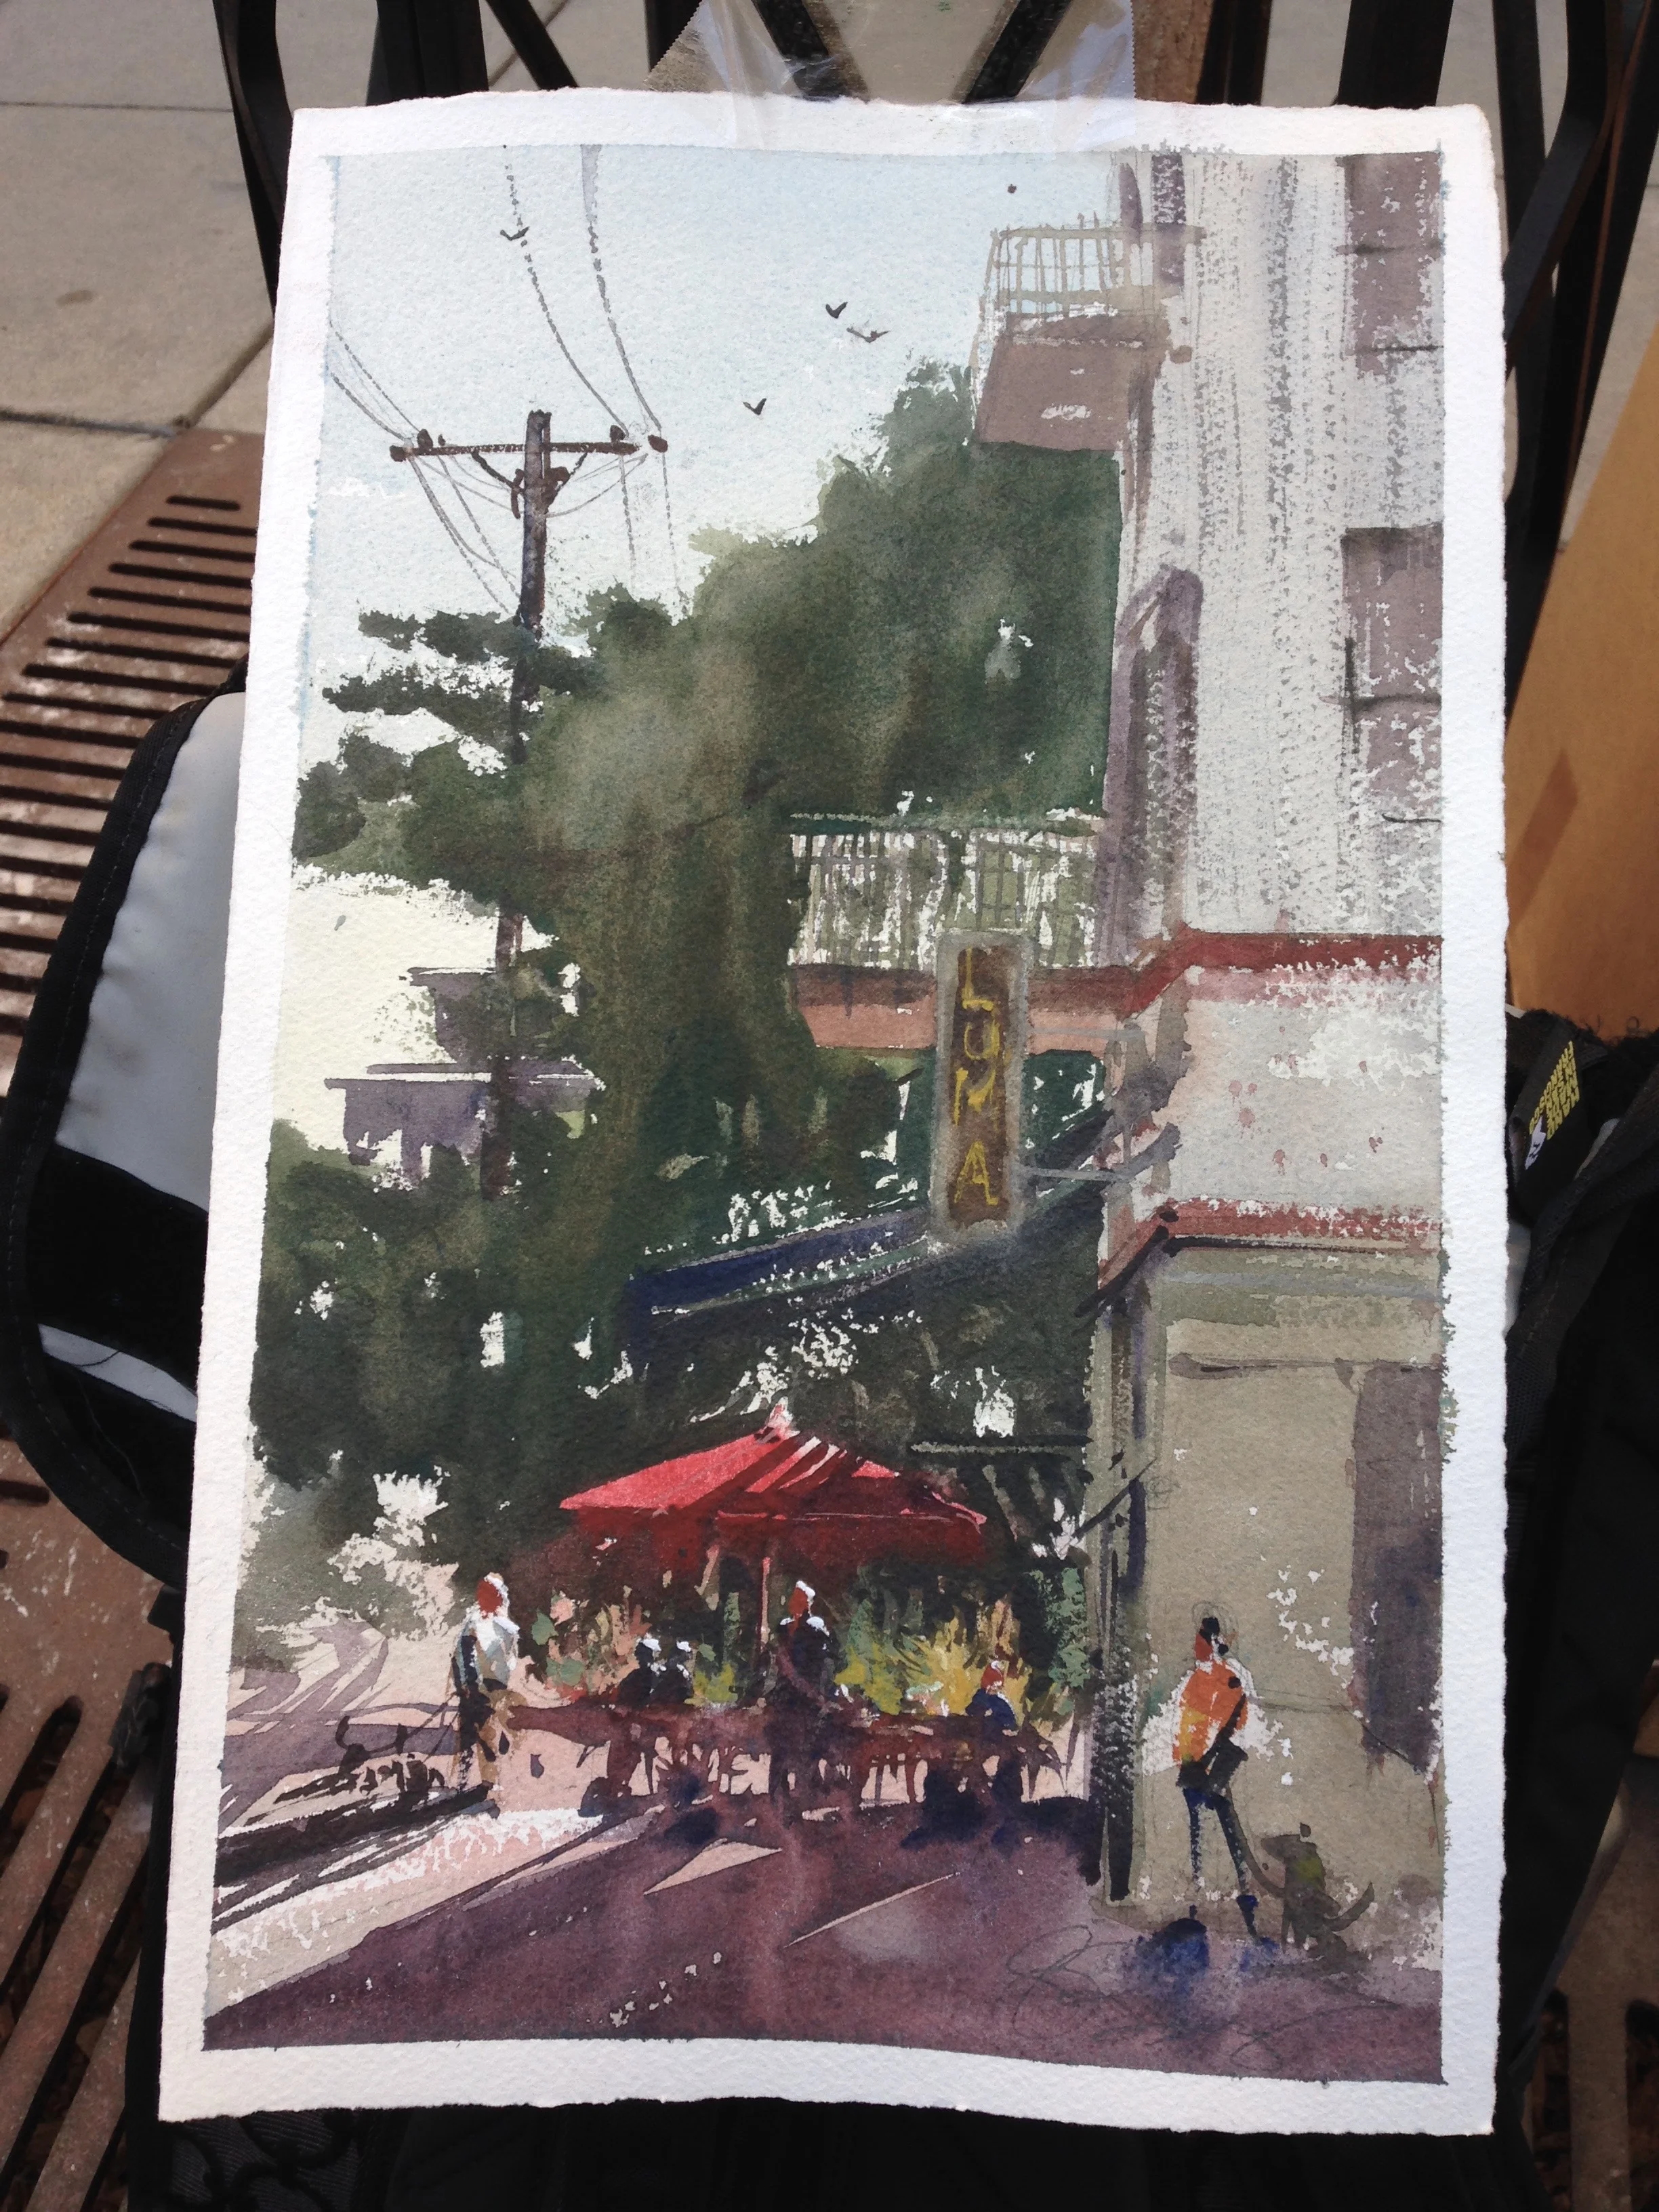
Again, I did a wash, top to bottom, preserving a few whites, including the umbrella. I blocked in the building and the dark tree in the background. I painted the red umbrella then, with the tree dry, to keep a sharp edge on the top, but pulled it into the dark green under it, to get it to run and mix. Next were the people, cast shadows, and various bits of dry brush work.
There were a few bumps along the way. I got caught up on the balcony up above, which I should have simplified- a dumb mistake that I would remedy if I painted it again, as well as preserving a paler value around the Luma sign, to make it pop. Instead, I mixed up an opaque pale grey, and brushed it in. One trick? To push the people forward, I used a bit of Holbein's Jaune Brilliant, No. 2 (a pale valued yellow watercolor, mixed with white) and mixed up some thick, pale valued colors for the plants that were sunlit in the background. I brushed them in and didn't sweat it in the least. I'm not a purist, and more importantly, this pushed the people forward and put them in the shadow of the building
This last piece I did on Sunday, in Benicia. This was my second attempt.

I did a sketch for this too, although I moved over to the right, after the fact. No photo though. :(

I started painting this late in the day and had to rush some. I then did a few touch-ups back home. The basic process is the same- 2 steps, first wash is my lights, top to bottom. I let it dry and work on top, doing some wet into wet for the darker forms when able. One difference? I Painted down to the horizon line for the sky, and kept a thin line of division between the sky and water. I then painted the water, and while it was drying I went back up top and worked on the mountains and bridge. I wish I had gotten in there faster, so the hills would be softer, but that's the way it goes. After I came home, I decided the foreground wasn't dark enough, so I taped it back up and put in a darker wash. I also carefully cut around the luminated boat on the left with some dry brush work. This made the boat pop and helped extend the foreground a bit.
All in all, a lot of fun. I've had a long hard road with getting up to speed with plein air work. I have made, frankly, a lot of paintings I've not been satisfied with in the least, but I thought these weren't too shabby. What has really helped the most is probably 3 recent developments-
1) The small preliminary sketch is something I've started doing every time. It helps me remove things from the view I don't need. I find structural problems from the get go. It helps me spend a bit of time really thinking about the subject, its values and composition, and figuring out basic perspective for the scene, instead of jumping right into painting before I'm honestly ready. I even refer back to the sketch a little as I paint, to remind me of the original composition and value relationships I was aiming for.
2) I follow the simple 2-step process. This doesn't mean every picture is a gem, but it, at the very least, helps me control things a bit so I've stopped having stuff explode everywhere. Now I can focus (most of the time) on some of the finer details, instead of just trying to not crash and burn.
3) After I've finished, for each and every one, I've put it away and come back to it a bit later. After the pause, I look it over and add those touches here and there that I think will make it sparkle as a painting, not just as a representation of what I saw. This little bit of distance has helped my judgement immensely.